---
title: "Best Video Format for Instagram: Reels, Feed & Stories"
canonical: "https://blitzreels.com/blog/best-video-format-for-instagram"
---
# Best Video Format for Instagram: Reels, Feed & Stories
URL: https://blitzreels.com/blog/best-video-format-for-instagram
Markdown URL: https://blitzreels.com/blog/best-video-format-for-instagram.md
Published: 2026-08-12
Author: BlitzReels
Discover the best video format for Instagram in 2026. Get specs for Reels, feed, and Stories to optimize your content for engagement.
Tags: best video format for instagram, instagram reels format, instagram video specs, mp4 vs mov instagram, instagram export settings

MP4 with H.264 video and AAC audio is the best video format for Instagram because it gives the safest compatibility and the smallest file size without sacrificing quality. Reels and Stories are optimized for **1080 × 1920 px** at **9:16**, and that vertical standard now defines how Instagram video is consumed on phones.
Instagram's video stack has narrowed around phone-first delivery, but the key decision is still about **what survives compression cleanly**. A file can be technically acceptable and still look soft, blocky, or oddly cropped after upload, so the export choice matters more than most creators think.
## Table of Contents
- [The Definitive Best Video Format for Instagram](#the-definitive-best-video-format-for-instagram)
- [Why this export profile works](#why-this-export-profile-works)
- [Containers vs Codecs Explained](#containers-vs-codecs-explained)
- [MP4 and MOV are not the same decision as H.264 and H.265](#mp4-and-mov-are-not-the-same-decision-as-h264-and-h265)
- [Why H.264 is still the practical winner](#why-h264-is-still-the-practical-winner)
- [Instagram Video Specs by Placement](#instagram-video-specs-by-placement)
- [What to export for each placement](#what-to-export-for-each-placement)
- [A note on frame rate and length](#a-note-on-frame-rate-and-length)
- [The Quality vs File Size Tradeoff](#the-quality-vs-file-size-tradeoff)
- [Where extra quality stops helping](#where-extra-quality-stops-helping)
- [What usually works better](#what-usually-works-better)
- [Export Settings Checklist for Editors](#export-settings-checklist-for-editors)
- [Export preset priorities](#export-preset-priorities)
- [What the export panel should look like](#what-the-export-panel-should-look-like)
- [Troubleshooting Common Upload Issues](#troubleshooting-common-upload-issues)
- [When the video looks soft](#when-the-video-looks-soft)
- [When audio drifts out of sync](#when-audio-drifts-out-of-sync)
- [When the crop kills the composition](#when-the-crop-kills-the-composition)
- [Final Thoughts and Quick Reference](#final-thoughts-and-quick-reference)
## The Definitive Best Video Format for Instagram
The **best video format for Instagram** is **MP4 with H.264 video and AAC audio**. That combination is the safest default because it matches the format Instagram handles most predictably, which usually means fewer processing headaches, fewer playback surprises, and less visual damage after upload. The same recommendation shows up across practical export guides and benchmark writeups, and it stays consistent because it is the format profile Instagram is least likely to mangle during ingest, including [Instagram video format guide](https://www.taja.ai/blog/instagram-video-format) and [Instagram video formats benchmark](https://blog.hubspot.com/marketing/instagram-video-formats).
### Why this export profile works
Instagram does not reward clever container experiments. It rewards files that already resemble what the platform wants to publish, and that is where **MP4 + H.264 + AAC** wins. A cleanly encoded file gives the app less work to do, which matters because every extra layer of conversion can add softness, banding, or motion artifacts.
> **Practical rule:** export for Instagram, not for the timeline inside the editing app. The cleaner the file on arrival, the less Instagram has to rewrite it.
MOV is accepted, but it is not the safer default. In day-to-day publishing, MP4 is the file editors can hand off with the fewest compatibility questions, especially when the clip has to move between desktop software, cloud storage, and a mobile upload flow. That is why a straightforward MP4 preset stays the most dependable choice for creators who want to publish fast without checking every device twice.
For creators turning clips into Reels, [BlitzReels for Instagram Reels](https://blitzreels.com/use-cases/instagram-reels) fits naturally into that workflow because it focuses on short-form editing, captions, resizing, and export-friendly formatting before the file ever reaches Instagram. That matters most when the project needs clipping, reframing, and title-card treatment in a hurry.
## Containers vs Codecs Explained
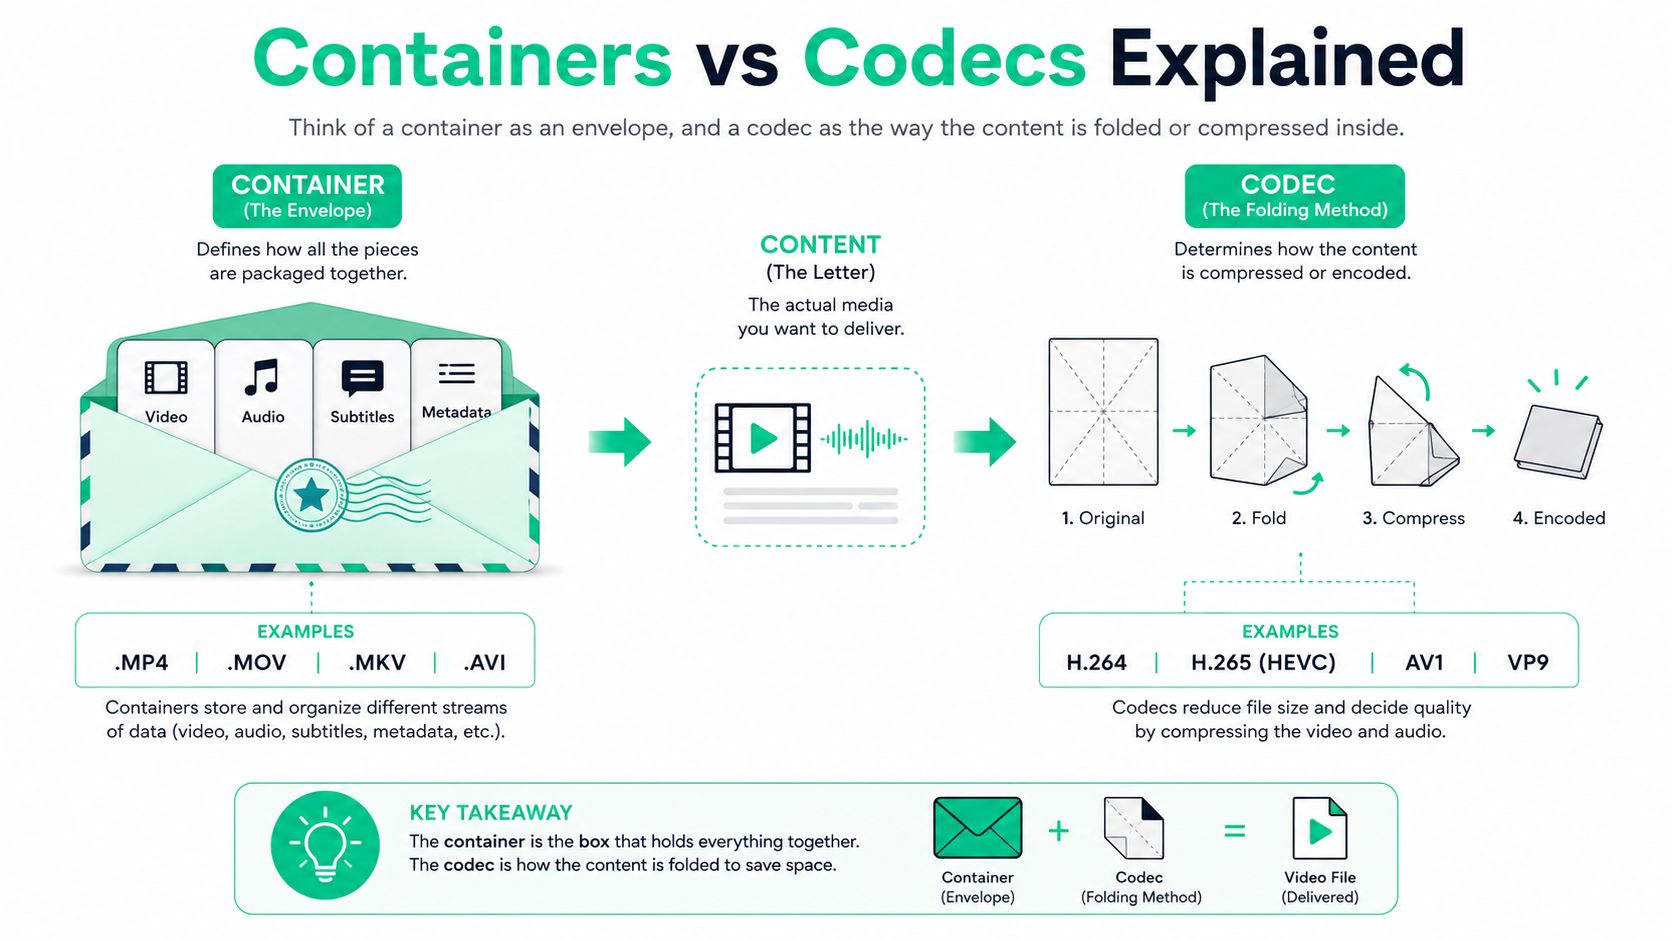
A lot of upload problems start with a simple mix-up. The **container** is the file shell, and the **codec** is how the video inside that shell is compressed. Think of the container as the envelope and the codec as the letter inside, because changing the envelope doesn't change the message, but changing the way the message is written absolutely changes how it arrives.
### MP4 and MOV are not the same decision as H.264 and H.265
MP4 and MOV are both containers, and Instagram can accept both. The safer everyday choice is still MP4 because it travels well across devices and apps, while MOV can be fine but tends to be less universal in mixed publishing workflows. The codec decision matters even more, because **H.264** remains the most dependable option for Instagram uploads, while **H.265** can be efficient but is more likely to create compatibility friction on some devices and in some upload paths ([codec glossary](https://blitzreels.com/glossary/codec)).
That's why a file can have a “good” extension and still be a bad upload. A high-efficiency codec may save space, but if Instagram or the device decoding it has to work harder, the result can be slower handling, extra transcoding, or a file that looks worse after the platform has its way with it. For creators who care about delivery more than file-theory purity, H.264 is usually the smarter trade.
For a broader look at how bitrate and streaming delivery interact on large files, Premier Broadband's [4K video streaming bandwidth guide](https://premierbroadband.com/4-k-video-streaming-bandwidth/) is useful background reading. The same basic logic applies here, because heavier files are not automatically better if the delivery system is going to compress them anyway.
### Why H.264 is still the practical winner
H.264 wins because it's the stable middle ground. It preserves quality well, plays nicely with common editing apps, and avoids the “looks great on export, looks strange after upload” problem that shows up when creators chase a more modern codec for no real platform benefit. Instagram's ecosystem has been standardized around predictable mobile playback, not around letting the source file stay untouched.
That's also why editors often describe H.264 as boring. Boring is good when the goal is publishing, not showing off export settings. For Instagram, boring usually means fewer surprises.
## Instagram Video Specs by Placement
Instagram is not a single upload setting with three labels. **Reels, Feed posts, and Stories** reward different framing choices, and the right export depends on where the clip will be viewed. The shared baseline is still vertical delivery, but the feed is the one place where **4:5** often makes more practical sense than going full-screen.
> **Practical rule:** use **9:16** when the placement is full-screen, use **4:5** when the goal is to dominate the feed without forcing a hard crop.
| Placement | Aspect Ratio | Resolution | Max Length |
|---|---:|---:|---:|
| Reels | 9:16 | 1080 × 1920 px | 90 seconds |
| Feed | 4:5, 1:1, 16:9 | 1080 × 1350 px, 1080 × 1080 px, 1080 × 566 px | 60 minutes in some placements |
| Stories | 9:16 | 1080 × 1920 px | 60 seconds per segment |
### What to export for each placement
**Reels** work best as a vertical-first format. The clean target is **1080 × 1920 px** at **9:16**, because the frame fills the phone screen and matches Instagram's full-screen viewing behavior ([vertical video guide](https://www.crehana.com/blog/transformacion-digital/formato-video-instagram/)). Reels now support videos up to **90 seconds**. If you need to reframe a horizontal clip quickly, [BlitzReels resize video for Instagram Reels](https://blitzreels.com/tools/resize-video-for-instagram-reels) is a practical option because it centers the crop around short-form output instead of forcing a manual rebuild of the frame.
**Stories** use the same **9:16** vertical frame, and they are built for phone-native viewing as well. The difference is pacing, since Stories are segmented and can run up to **60 seconds per segment**.
**Feed video** is where **4:5** earns its place. That format uses more screen real estate than **1:1** without demanding a full-screen commitment, which makes it a strong compromise for scroll-based viewing. The feed still supports other shapes, including **1:1** and **16:9**, but **4:5 at 1080 × 1350 px** is often the most useful portrait choice when the subject needs height without losing context.
### A note on frame rate and length
**30 fps** is still the practical default for Instagram, because it keeps files manageable and fits the platform's mobile playback model. Longer clips belong in the feed or in carefully structured short-form sequences, not in one export preset for every placement. Placement drives the edit, not the other way around.
## The Quality vs File Size Tradeoff
Higher resolution sounds safer, but Instagram often treats it like extra material to squeeze. A massive source file can survive the journey, yet still come out looking softer than a well-prepared **1080p** export because the platform recompresses everything to fit its own delivery logic. That's why people who upload huge files and very high bitrates sometimes get worse results than editors who send a cleaner, smaller master.
### Where extra quality stops helping
The useful question isn't whether the source file can be made bigger. It's whether Instagram is going to preserve the extra data in any meaningful way. Once the upload is large enough to trigger stronger recompression, extra bitrate becomes wasted bandwidth, extra render time, and extra waiting with no guaranteed visual gain. Current guidance commonly recommends staying in a controlled export range rather than chasing oversized masters, and one widely cited target for **1080p** files is a bitrate around **3,500 kbps to 5,000 kbps** ([quality upload guidance](https://postonce.to/blog/instagram-video-format)).
> Higher bitrate is not a badge of honor on Instagram. It only helps when the source file stays close to the platform's preferred delivery path.
That's also why **4K** isn't automatically the answer for short-form social. If the clip is going to be viewed on a phone and compressed again by Instagram, the extra source detail often disappears during delivery. Editors can still use a cleaner, high-quality master as a starting point, but the final export should be tuned for the app, not for archive value.
### What usually works better
A tightly controlled **1080 × 1920** or **1080 × 1350** export gives Instagram less room to degrade the file. In practice, that means fewer aggressive re-encodes, faster uploads, and fewer artifacts around motion, text, and skin tone. It also keeps file sizes manageable for teams publishing at speed.
For creators who want to normalize files before upload, [BlitzReels compress video for Instagram](https://blitzreels.com/tools/compress-video-for-instagram) is useful because compression and resizing happen in a short-form workflow instead of being bolted on after the edit.
## Export Settings Checklist for Editors
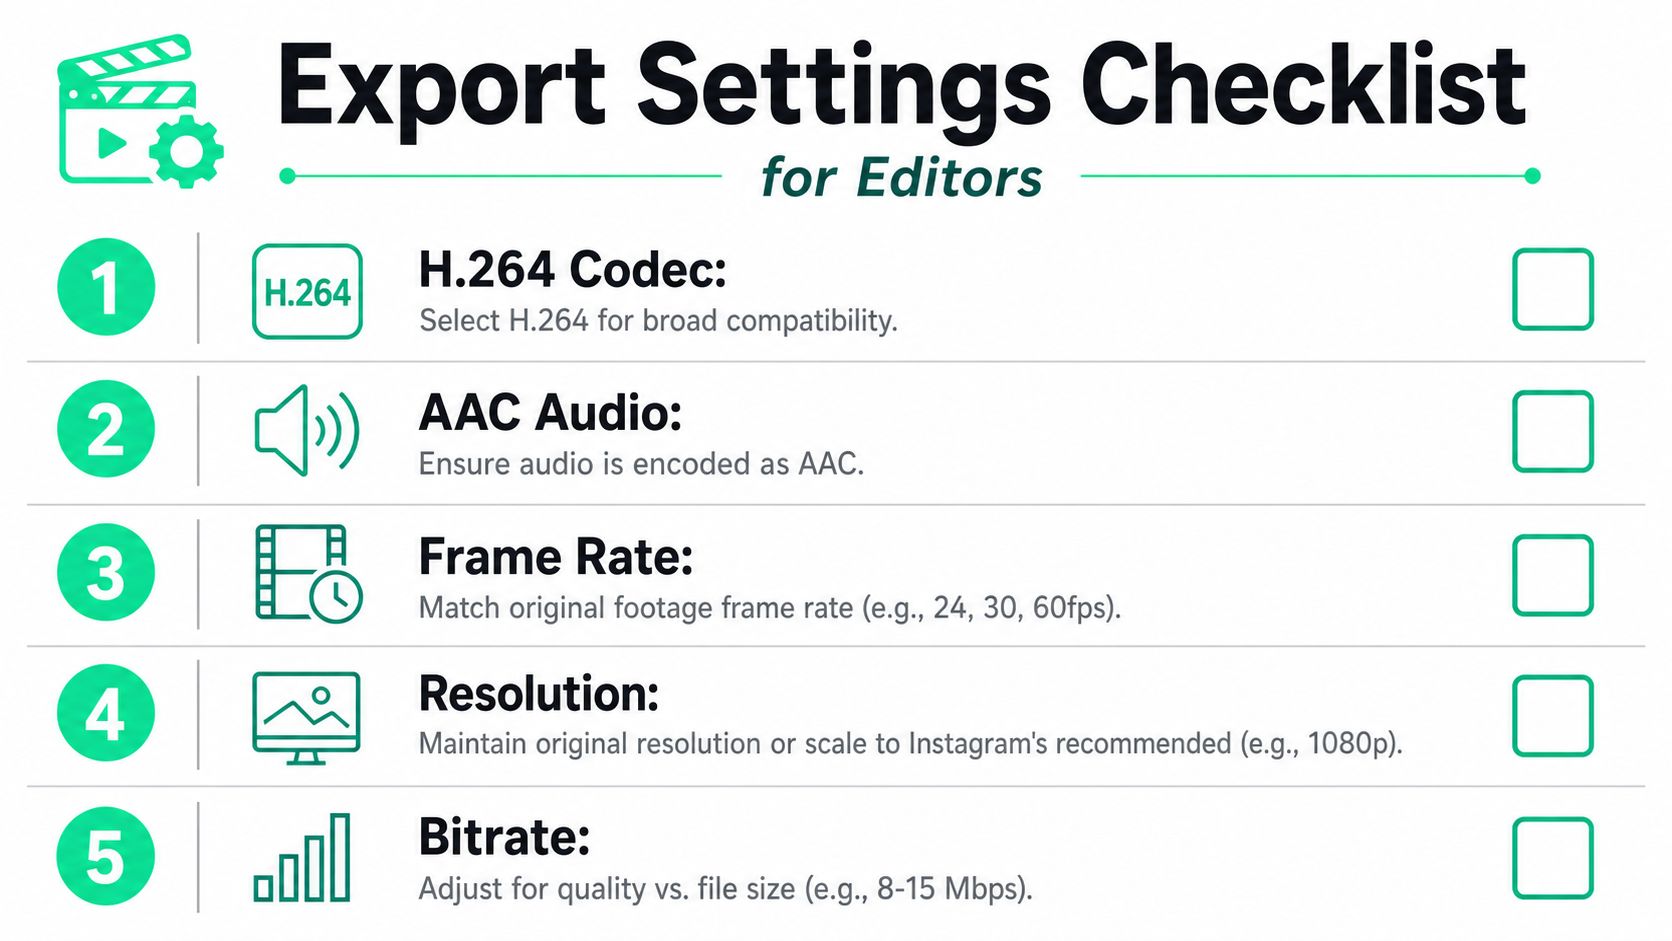
A solid preset saves more time than any last-minute fix. In Premiere Pro, DaVinci Resolve, or CapCut, the export goal is the same, **MP4**, **H.264**, **AAC**, and the right frame and crop for the placement. Instagram's own compression will still touch the file, so the job is to hand it something close to final, not something that needs rescue.
### Export preset priorities
- **Codec first:** choose **H.264** for the most predictable Instagram compatibility.
- **Audio next:** encode sound as **AAC**, because it's the safest default for mobile delivery.
- **Frame rate match:** keep the export aligned with the source footage, whether that's **24**, **30**, or **60 fps**.
- **Resolution discipline:** stay at the intended placement size, usually **1080p** for short-form posts.
- **Bitrate control:** keep the file efficient instead of inflating it for no platform benefit.
Instagram workflow also benefits from clean captions and centered crops. When a project includes spoken lines, [how to caption corporate videos](https://translators-usa.com/multilingual-captioning-services-for-videos/) is a useful reference for teams handling subtitle-heavy edits, especially when the same clip needs to work with or without sound.
### What the export panel should look like
H.264 with AAC is the baseline, but the rest of the panel still matters. Variable bitrate can be fine when the final file stays tidy, while render depth settings should be used carefully so the export doesn't waste time processing detail that Instagram will compress away. Matching the source frame rate is especially important for screen recordings and mixed-camera projects, because bad timing at export can create subtle motion problems that become obvious after upload.
For editors using templates or fast-turnaround tools, the practical advantage comes from automating the repetitive parts. That includes resizing the frame, burning in captions, and keeping the subject centered so the post looks deliberate instead of cropped on accident.
Video:
## Troubleshooting Common Upload Issues
A file can look perfect in the editor and still fail on Instagram. The usual problems are predictable, and they're rarely random. Blurry playback usually means the upload file and the platform's preferred delivery size don't match well, audio drift often traces back to variable frame rate footage, and bad crops usually come from choosing the wrong aspect ratio before export.
### When the video looks soft
A soft-looking upload usually means the file was too large, too highly compressed, or resized too aggressively on the way in. The clean fix is to export at the placement's native framing, not at an oversized source resolution that Instagram is going to crush later. If the clip was edited as a widescreen source and then forced into a vertical Reel at the last minute, the loss in clarity is usually obvious.
### When audio drifts out of sync
Screen recordings are a common culprit here, especially when the source uses variable frame rate behavior. Converting the timeline to a constant frame rate before export usually fixes the mismatch, because Instagram likes predictable timing better than smart-but-unsteady source files. If the sound looks fine in the editor but slips after upload, the frame timing is often the first thing to check.
### When the crop kills the composition
This is almost always an aspect ratio mistake, not a rendering mistake. Reels and Stories need vertical-safe framing, while feed posts often need **4:5** framing to protect the subject and fill the screen better in-scroll. Any text, face, or logo close to the edges should be checked against the platform's UI overlap before export, or the app will hide critical parts of the shot.
## Final Thoughts and Quick Reference
**Cheat sheet:**
- **MP4 + H.264 + AAC** is the safest default.
- **9:16 at 1080 × 1920 px** is the right choice for Reels and Stories.
- **4:5 at 1080 × 1350 px** is often smarter for feed posts.
- Keep bitrate controlled, because Instagram will still compress the upload.
- Check audio, crop edges, and caption placement before publishing.
For a broader short-form workflow reference, the [short-form video glossary](https://blitzreels.com/glossary/short-form-video) is a useful companion when the same clip has to work across Reels, Shorts, and other vertical placements. The technical details matter, but the ultimate win is turning them into a repeatable export habit that keeps posts clean and fast.
---
BlitzReels helps creators turn raw clips into vertical, captioned, platform-ready short-form videos without wrestling with manual reframing every time. If the next upload needs resizing, hooks, title cards, captions, or faster repurposing for Instagram Reels, visit [BlitzReels](https://blitzreels.com) and see how the workflow fits into the edit-to-post process.