---
title: "Converting WAV to MP3: A Creator's Guide for 2026"
canonical: "https://blitzreels.com/blog/converting-wav-to-mp-3"
---
# Converting WAV to MP3: A Creator's Guide for 2026
URL: https://blitzreels.com/blog/converting-wav-to-mp-3
Markdown URL: https://blitzreels.com/blog/converting-wav-to-mp-3.md
Published: 2026-06-25
Author: BlitzReels
Learn how converting WAV to MP3 impacts your short-form videos. Our guide covers the best tools, settings, and workflows for TikTok, Reels, and Shorts.
Tags: converting wav to mp3, audio conversion, video editing audio, short form content, mp3 bitrate

A creator records a clean voiceover, drops it into a Reel edit, and then hits the first slowdown. The WAV file is huge. It takes longer to move between tools, longer to upload, and longer to duplicate across versions with different hooks, title cards, captions, and aspect ratios.
That's why converting WAV to MP3 still matters, even in a fast short-form workflow packed with clipping, reframing, resizing, and template-based editing. The goal isn't to chase perfect technical purity. The goal is to keep audio sounding strong after social platforms process it, while making the file light enough to move quickly through editing and publishing.
## Table of Contents
- [Why Converting WAV to MP3 Still Matters for Video Creators](#why-converting-wav-to-mp3-still-matters-for-video-creators)
- [Bigger files slow creative iteration](#bigger-files-slow-creative-iteration)
- [MP3 fits the pace of short-form work](#mp3-fits-the-pace-of-short-form-work)
- [Choosing Your Ideal Conversion Method](#choosing-your-ideal-conversion-method)
- [Web tools for fast one-offs](#web-tools-for-fast-one-offs)
- [Desktop apps for everyday reliability](#desktop-apps-for-everyday-reliability)
- [Command-line tools for automation](#command-line-tools-for-automation)
- [A simple way to choose](#a-simple-way-to-choose)
- [The 60-Second Conversion for Busy Creators](#the-60-second-conversion-for-busy-creators)
- [Using an online converter for a one-off file](#using-an-online-converter-for-a-one-off-file)
- [Using VLC when the file stays on the desktop](#using-vlc-when-the-file-stays-on-the-desktop)
- [What counts as good enough](#what-counts-as-good-enough)
- [A Professional Workflow with Audacity and FFmpeg](#a-professional-workflow-with-audacity-and-ffmpeg)
- [Audacity for cleanup and batch-ready exports](#audacity-for-cleanup-and-batch-ready-exports)
- [FFmpeg for metadata and repeatable automation](#ffmpeg-for-metadata-and-repeatable-automation)
- [Decoding Bitrates for Perfect Social Media Audio](#decoding-bitrates-for-perfect-social-media-audio)
- [What bitrate actually changes](#what-bitrate-actually-changes)
- [MP3 bitrate recommendations for creators](#mp3-bitrate-recommendations-for-creators)
- [Common Pitfalls and Your Next Creative Step](#common-pitfalls-and-your-next-creative-step)
- [What not to do](#what-not-to-do)
## Why Converting WAV to MP3 Still Matters for Video Creators
WAV is excellent for recording and archiving. It's a poor format for speed.
In short-form production, that difference shows up immediately. A creator might record a crisp hook, cut three variants for TikTok, build a caption-first version for Reels, and make a resized export for Shorts. When the source audio is oversized, every step feels heavier than it needs to.
A practical reason sits behind this: **converting WAV to MP3 cuts file size by roughly 88% to 92%, turning a standard 44.1 kHz, 16-bit stereo WAV of about 10 MB per minute into an MP3 of about 1 MB per minute at 128 kbps**. That reduction made digital media distribution far more practical in the first place ([verified summary fact](#)). For creators, the same principle applies inside a modern workflow.
### Bigger files slow creative iteration
Large WAV files don't just consume storage. They make routine tasks feel clunky.
- **Versioning gets messy:** Multiple edits with different hooks or title cards can pile up fast.
- **Transfers take longer:** Moving voiceovers between devices, editors, and cloud folders adds friction.
- **Uploads become less forgiving:** Social workflows often involve several exports before the final post.
- **Libraries bloat quickly:** Reusable sound bites, intros, narration takes, and music beds stack up over time.
> **Practical rule:** Keep WAV as the master, then export MP3 for the working version used in fast social edits.
The distinction matters because creators usually aren't mastering for an album. They're trying to publish quickly without wrecking intelligibility or tone. A clean MP3 handles that job well when it's encoded correctly.
### MP3 fits the pace of short-form work
The best short-form workflows remove unnecessary weight. That includes audio.
A lighter audio file is easier to audition inside quick edits, easier to pass into subtitle and caption steps, and easier to pair with clipped footage when testing multiple formats. Anyone comparing formats can get a useful overview from [Mogul on music file formats](https://www.usemogul.com/post/is-wav-better-than-mp-3), especially when deciding what belongs in the archive versus what belongs in the publishing pipeline.
Creators building repeatable systems for TikTok, Reels, and Shorts usually benefit from the same mindset discussed in this guide to [short-form video workflows](https://www.blitzreels.com/blog/short-form-video). Use the heavyweight format for capture and safekeeping. Use the efficient format for editing and distribution.
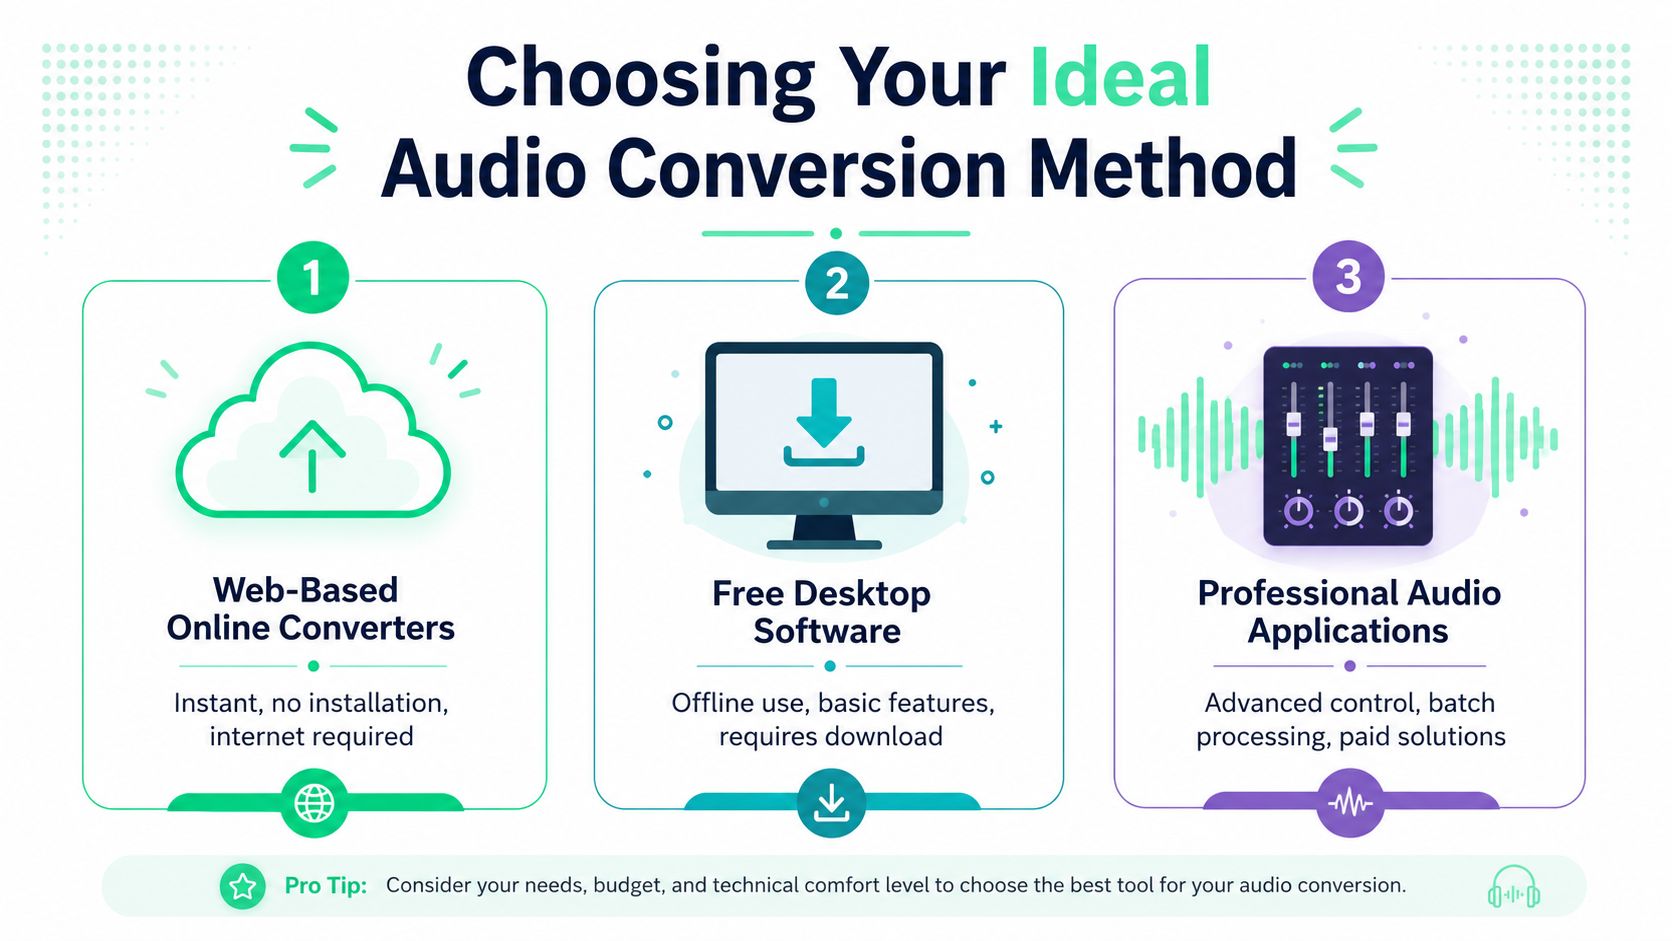
## Choosing Your Ideal Conversion Method
Not every creator needs the same conversion setup. The right choice depends on volume, speed, and how much control the workflow needs.
### Web tools for fast one-offs
Online converters are the quickest route when there's one file and no need for deep settings. A creator uploads the WAV, chooses MP3, downloads the result, and gets back to editing.
That convenience has a trade-off. Web tools usually expose fewer export controls, and they're not ideal when the workflow includes repeated batches, metadata handling, or quality checks before building subtitles and social cuts.
### Desktop apps for everyday reliability
Desktop software sits in the practical middle. Tools like Audacity or VLC work well when creators want offline use, repeatability, and basic control over output settings without learning command-line syntax.
This route usually works best for people who:
- **Edit regularly:** Weekly or daily short-form output benefits from a stable local tool.
- **Need simple cleanup:** Trimming silence and leveling a voiceover before export is easier in a desktop editor.
- **Want fewer upload steps:** Files stay on the machine instead of bouncing through a browser.
> Desktop conversion is often the easiest long-term choice because it balances speed with enough control to avoid avoidable mistakes.
### Command-line tools for automation
FFmpeg is the strongest option for power users. It isn't the friendliest for beginners, but it's hard to beat when a team needs repeatable exports, folder-based workflows, or scripts that process large batches of files the same way every time.
This setup makes sense when the audio workflow is part of a larger production system. For example, a creator might strip audio from raw clips, convert WAV narration, and feed the results into a larger edit chain. Teams already working with extraction tools can pair conversion with a [video to audio workflow](https://www.blitzreels.com/tools/video-to-audio) to keep source handling consistent.
### A simple way to choose
The quickest decision guide looks like this:
| Method | Best fit | Main strength | Main limitation |
|---|---|---|---|
| Online converter | Single urgent file | Fastest start | Less control |
| Desktop app | Regular creator workflow | Good balance | Manual steps remain |
| FFmpeg | Batch or automated pipeline | Precision and repeatability | Steeper learning curve |
A one-file emergency doesn't need a production-grade setup. A creator publishing every day usually does.
## The 60-Second Conversion for Busy Creators
Sometimes the only goal is getting a usable MP3 into the edit before momentum dies. For that situation, two methods stand out: an online converter for pure speed, and VLC for creators who already have a solid desktop media player installed.

### Using an online converter for a one-off file
This method works best when the file is simple. Think single voiceovers, spoken hooks, or a quick narration take for a product clip.
The process is straightforward:
1. **Upload the WAV file.**
2. **Choose MP3 as the output format.**
3. **Pick a sensible bitrate if the tool allows it.**
4. **Convert and download.**
5. **Drop the MP3 straight into the video editor.**
For short-form work, the biggest win is speed. The creator can move right into syncing visuals, testing a title card, or timing captions to the first spoken line.
A quick convert is often enough for:
- **Talking-head intros**
- **Voiceover explainers**
- **UGC-style ad hooks**
- **LinkedIn clips with clean spoken audio**
The limitation is that online tools don't always make audio decisions transparent. If the platform matters, especially TikTok or Reels, creators usually want more control than a generic converter offers.
### Using VLC when the file stays on the desktop
VLC hides a solid converter inside a familiar interface. For many creators, that makes it the fastest no-download-required option if VLC is already installed.
Use this path:
1. Open VLC.
2. Go to **Media** and select **Convert / Save**.
3. Add the WAV file.
4. Click **Convert / Save** again.
5. Choose an **MP3 profile**.
6. Pick the destination filename.
7. Start the conversion.
That's enough for a working export that can go straight into a short-form timeline. It's especially handy when a creator is already juggling clips, b-roll, vertical crops, and multiple aspect-ratio exports on the same machine.
> If the creator only needs one clean MP3 and doesn't want another app, VLC is usually the fastest desktop answer.
A visual walkthrough helps if the menu path feels buried:
### What counts as good enough
For fast social editing, “good enough” means the voice stays clear after upload and the file doesn't drag down the workflow. It doesn't mean chasing perfect audiophile output for a phone-first platform that will process the audio again anyway.
That's why creators on a deadline should optimize for:
- **Clear speech**
- **Reasonable file size**
- **Reliable compatibility**
- **Easy import into the editing timeline**
If the workflow grows beyond single-file conversion, it's time to switch to a more controlled setup.
## A Professional Workflow with Audacity and FFmpeg
Creators who publish at scale need more than a one-click convert button. They need cleanup, predictable exports, and a way to preserve order across many files.
### Audacity for cleanup and batch-ready exports
Audacity is a practical choice because it handles the steps that usually matter before conversion. A creator can trim dead air, normalize levels, and export MP3 without jumping between several apps.
A reliable workflow looks like this:
1. **Import the WAV file into Audacity.**
2. **Trim silence at the start and end.**
3. **Normalize levels so the voice sits consistently.**
4. **Check for clipping or uneven peaks.**
5. **Export as MP3 with the selected bitrate.**
6. **Review the output before dropping it into the video project.**
This matters for short-form because platform captions, on-beat text, and punchy hook timing all work better when the spoken audio is clean and steady. Uneven levels can make the first line feel weak, and that's often the line that decides whether a viewer keeps watching.
For creators recording many files at once, Audacity also supports a more repeatable routine. Organizing intros, sponsor reads, alternate hooks, and voiceover versions becomes much easier when the export settings stay consistent from file to file.
### FFmpeg for metadata and repeatable automation
Professional workflows often break in less obvious places. One of the biggest is metadata.
**Data shows that 68% of users lose metadata when converting studio WAVs to MP3, and tools like FFmpeg with the `-metadata` flag or Audacity's Export Metadata feature can prevent that loss** ([Audacity forum discussion on metadata loss](https://forum.audacityteam.org/t/converting-wav-to-mp3-files-without-losing-quality/48049)).
That matters more than many creator guides admit. Once a library grows, lost artist names, track titles, or sequence labels make asset management slower. A folder full of vaguely named files is frustrating when a team needs to rebuild clips, revoice a section, or repurpose old assets into a new series.
A simple FFmpeg pattern looks like this:
- **Input:** the original WAV file
- **Codec:** MP3 export through FFmpeg
- **Metadata flags:** preserve title, artist, album, or project naming
- **Output:** a clean MP3 that still carries usable library information
> Clean filenames help. Preserved metadata helps more when the archive grows.
Creators who record voiceovers regularly may also benefit from a stronger recording process before conversion starts. This guide on [how to voice over a video](https://www.blitzreels.com/blog/how-to-voice-over-a-video) is useful for tightening the source stage, which makes every later export easier.
## Decoding Bitrates for Perfect Social Media Audio
Bitrate decides how much audio detail stays in the MP3. In creator terms, it's the setting that shapes the balance between file size and how well the audio survives upload.
The usual mistake is assuming that the highest bitrate always wins. That isn't how social platforms behave.
### What bitrate actually changes
A higher bitrate usually means more retained detail. That can help with music, layered sound, and dynamic voice work. But short-form creators don't publish to a neutral environment. TikTok, Reels, and Shorts process audio again after upload.
That's why platform behavior matters more than theory. **A 2024 study found that 73% of creators using 320 kbps MP3s experienced audible quality degradation on TikTok because the platform's compression discards frequencies above 15 kHz regardless of source bitrate** ([Zamzar discussion of WAV to MP3 conversion](https://www.zamzar.com/convert/wav-to-mp3/)). In practice, that means a more optimized setting like **192 kbps** can make more sense for short-form uploads than blindly choosing 320 kbps every time.
> More bitrate doesn't always mean better results after the platform re-encodes the audio.
Constant Bitrate, or CBR, is usually the safer choice for compatibility and predictability. Variable Bitrate, or VBR, can be efficient, but many creators prefer the consistency of CBR when they're exporting assets that will pass through several tools.
Anyone who wants a quick refresher on terminology can use this plain-English [bitrate glossary](https://www.blitzreels.com/glossary/bitrate).
### MP3 bitrate recommendations for creators
The cleanest way to think about bitrate is by content type.
| Bitrate | Quality | Best For |
|---|---|---|
| 96 kbps CBR | Lean, speech-focused | Audio-only spoken-word podcasts or simple voice tracks, based on guidance from [The Podcast Host on converting WAV to MP3](https://www.thepodcasthost.com/editing-production/how-to-convert-wav-to-mp3/) |
| 192 kbps CBR | Strong balance of size and quality | Voiceovers for Reels, TikTok explainers, hooks, and short-form uploads that will be recompressed by the platform |
| 256 kbps or higher | Better for richer audio | Audio that includes music, sound effects, or wider dynamic range, also aligned with [The Podcast Host on converting WAV to MP3](https://www.thepodcasthost.com/editing-production/how-to-convert-wav-to-mp3/) |
A practical rule works well here. Spoken content can stay lean. Music-heavy or highly produced short-form audio usually benefits from moving up.
Creators testing caption timing, title cards, and fast visual cuts don't need bitrate anxiety. They need a dependable default. For many social workflows, **192 kbps CBR** is that default.
## Common Pitfalls and Your Next Creative Step
The biggest mistake in converting WAV to MP3 isn't choosing the wrong app. It's **double compression**.
That happens when someone takes an already compressed file, converts it again, or converts an MP3 back to WAV and then re-exports it as MP3. **That process can degrade audio clarity by up to 15% to 20% in dynamic range because of cumulative quantization noise** ([verified technical fact](#)). The fix is simple. Always keep the original WAV as the master.
### What not to do
A few habits cause most avoidable quality problems:
- **Re-exporting from an old MP3:** Start from the original WAV instead.
- **Treating WAV conversion as reversible:** Once audio has been compressed, exporting it back to WAV doesn't restore lost detail.
- **Archiving only the MP3:** Keep the master file for future edits, alternate cuts, and repurposed campaigns.
> Keep one untouched WAV archive. Build all working MP3s from that file.
This matters even more in short-form production because one audio source often becomes several assets. A creator might turn a single voice recording into a TikTok, an Instagram Reel, a YouTube Short, and a square teaser with different captions and resized framing. Repeated exports from compressed files make each generation weaker.
For the next step after conversion, the MP3 should move into the edit cleanly, sync to visuals quickly, and support readable captions without timing drift. Strong audio is only useful when it lands well inside the final cut. A guide to [syncing audio with video](https://www.blitzreels.com/blog/syncing-audio-with-video) helps tighten that handoff.
---
Once the MP3 is ready, the next bottleneck is usually editing speed. [BlitzReels](https://blitzreels.com) helps turn that finished audio into short-form content faster with auto captions, clipping, resizing, reframing, title cards, templates, and exports built for TikTok, Instagram Reels, YouTube Shorts, LinkedIn, and other social platforms.