---
title: "How to Crop Videos in iMovie (Mac & iPhone Guide)"
canonical: "https://blitzreels.com/blog/crop-videos-in-imovie"
---
# How to Crop Videos in iMovie (Mac & iPhone Guide)
URL: https://blitzreels.com/blog/crop-videos-in-imovie
Markdown URL: https://blitzreels.com/blog/crop-videos-in-imovie.md
Published: 2026-07-02
Author: BlitzReels
Learn how to crop videos in iMovie on Mac, iPhone, and iPad. Get the right aspect ratio for social media and fix common cropping issues with our detailed guide.
Tags: crop videos in imovie, imovie aspect ratio, edit video on iphone, video cropping, imovie tutorial

A lot of people open iMovie, drop in a clean phone clip, and immediately hit the same problem. The framing changes, heads get cut off, and a vertical video suddenly looks like it was forced into the wrong shape. That's especially frustrating when the goal is a TikTok, Reel, Short, or LinkedIn post that needs tight framing, captions, title cards, and fast turnaround.
The tricky part is that learning how to crop videos in iMovie isn't just about finding the crop button. It's about understanding what iMovie is trying to do to the frame in the first place, where that helps, and where it fights a modern short-form workflow.
## Table of Contents
- [Why Is iMovie Cropping Your Video Wrong](#why-is-imovie-cropping-your-video-wrong)
- [Why the frame changes on import](#why-the-frame-changes-on-import)
- [Mastering the Crop Tool on iMovie for Mac](#mastering-the-crop-tool-on-imovie-for-mac)
- [What each crop mode actually does](#what-each-crop-mode-actually-does)
- [When cropping hurts quality](#when-cropping-hurts-quality)
- [How to Crop Videos in iMovie on iPhone and iPad](#how-to-crop-videos-in-imovie-on-iphone-and-ipad)
- [The mobile crop workflow](#the-mobile-crop-workflow)
- [How to get cleaner framing on touchscreens](#how-to-get-cleaner-framing-on-touchscreens)
- [The Ultimate Workaround for Vertical Video in iMovie](#the-ultimate-workaround-for-vertical-video-in-imovie)
- [How the dummy clip method works](#how-the-dummy-clip-method-works)
- [Where this workaround breaks](#where-this-workaround-breaks)
- [Advanced Cropping Tips and Common Problems](#advanced-cropping-tips-and-common-problems)
- [Cropping Picture in Picture overlays](#cropping-picture-in-picture-overlays)
- [Quick fixes for the problems that keep coming back](#quick-fixes-for-the-problems-that-keep-coming-back)
- [Beyond iMovie A Faster Way to Create Social Clips](#beyond-imovie-a-faster-way-to-create-social-clips)
- [Where iMovie still works well](#where-imovie-still-works-well)
- [When a dedicated short form workflow makes more sense](#when-a-dedicated-short-form-workflow-makes-more-sense)
## Why Is iMovie Cropping Your Video Wrong
The most common reason iMovie seems to crop a video “wrong” is simple. **iMovie is locked to a 16:9 widescreen export format**, so it can't natively create vertical 9:16 or square 1:1 projects for platforms like TikTok, Instagram Reels, or YouTube Shorts, which is why vertical footage often gets cropped or padded as soon as it lands in the timeline, as explained in [this breakdown of iMovie's aspect ratio behavior](https://icecreamapps.com/learn/why-is-imovie-cropping-my-video.html).

That means the app isn't malfunctioning. It's following its own rules. A vertical phone clip doesn't match a horizontal 16:9 project, so iMovie tries to fill the frame. The result is the familiar zoomed-in look where the top and bottom of the original composition disappear.
### Why the frame changes on import
iMovie treats non-16:9 media as something that needs to be adapted to the project frame. For creators working on social clips, that causes two immediate trade-offs:
- **Crop to fill the frame** and lose parts of the original image
- **Fit the whole frame** and accept black bars
- **Rotate footage outside iMovie** if the source orientation isn't already correct
That last point matters more than many basic tutorials admit. iMovie doesn't include a built-in project aspect ratio switch or a true rotation workflow for changing project orientation, so creators often have to use Photos or QuickTime before import.
> **Practical rule:** If a vertical clip looks wrong in iMovie, the issue usually starts with project shape, not with the clip itself.
For anyone trying to crop videos in iMovie for social platforms, this is the core limitation to remember. Cropping in iMovie isn't just a framing choice. It's often a workaround for the app's fixed canvas.
A useful companion resource is [starryai's guide for social visuals](https://starryai.com/en/blog/aspect-ratio-converter), which gives a broader look at how aspect ratios affect platform-ready creative. It pairs well with a basic understanding of the [video crop definition in the BlitzReels glossary](https://www.blitzreels.com/glossary/crop), especially for creators juggling reframing, resizing, and clipping across multiple channels.
## Mastering the Crop Tool on iMovie for Mac
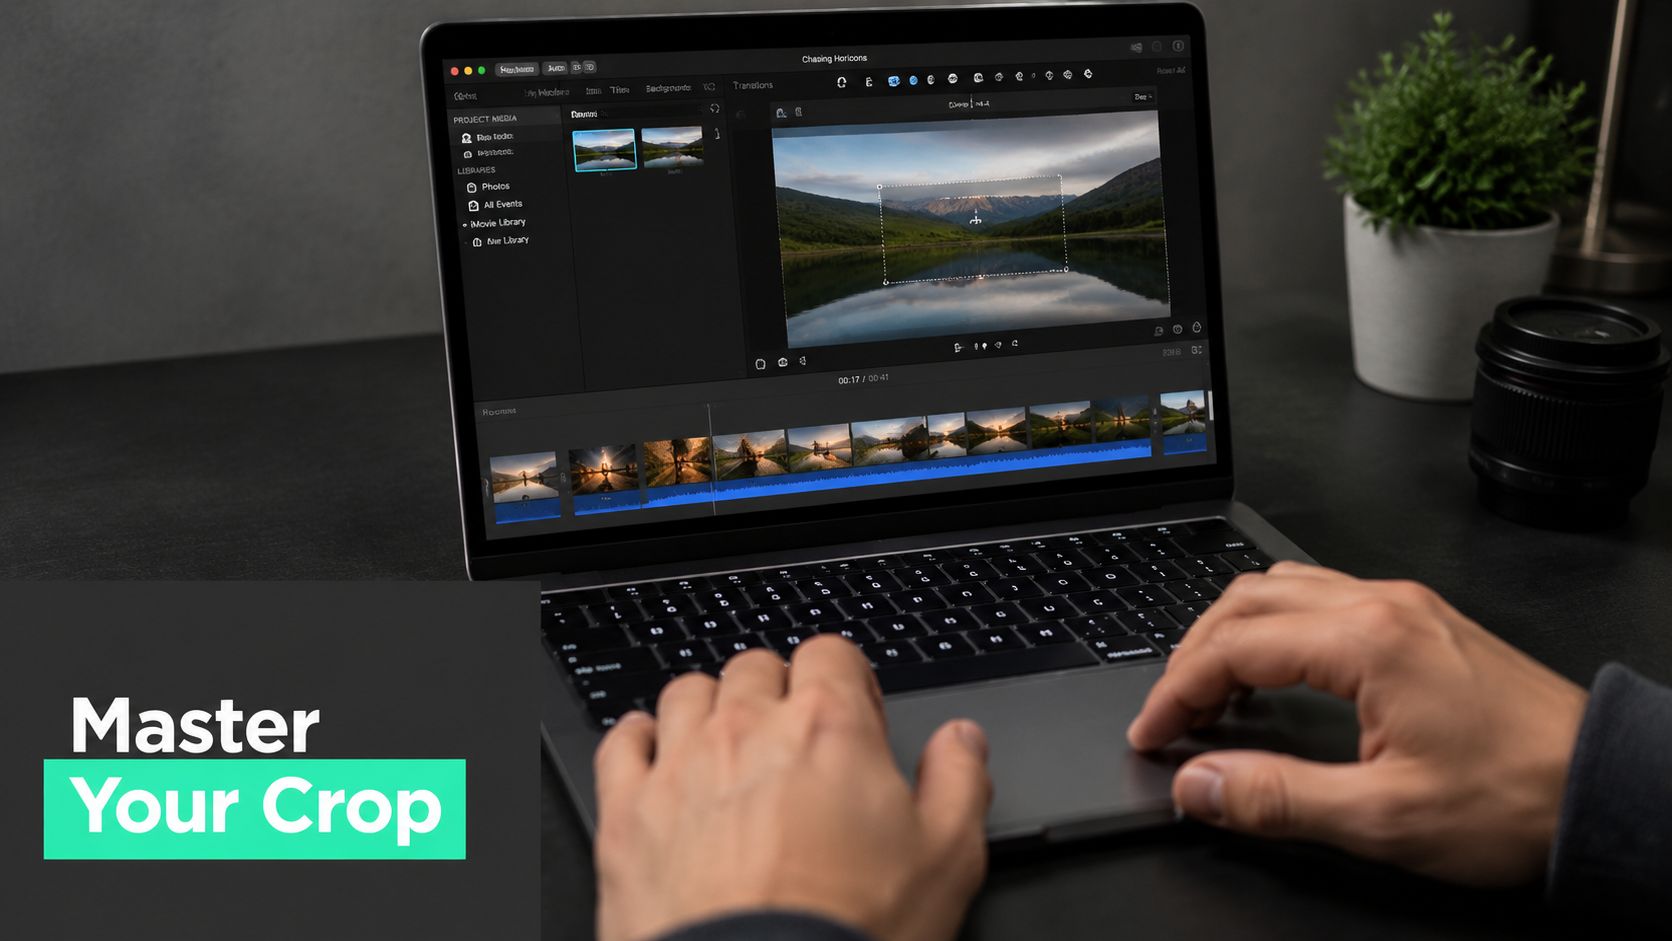
On Mac, iMovie gives more control than the mobile version, but the crop tools are still basic compared with professional editors. For short-form work, that means they're fine for quick reframing, rough punch-ins, and simple cleanup. They're less reliable for precision resizing, social-first templates, or repeated reformatting across platforms.
### What each crop mode actually does
To crop videos in iMovie on Mac:
1. Open the project and click the clip in the timeline.
2. In the preview window, click the **cropping tool**.
3. Choose one of the available modes.
4. Adjust the frame.
5. Click the checkmark to apply the change.
The important part is choosing the right mode. The options behave very differently.
| Mode | Best use | Main downside |
|---|---|---|
| **Fit** | Preserving the whole frame | Adds black bars when source and project shapes don't match |
| **Crop to Fill** | Filling the full screen | Cuts off edges and can hide titles, hands, or faces |
| **Ken Burns** | Adding motion to static or wide shots | Easy to overdo in short-form clips |
**Fit** is the safe option when composition matters. If the subject is framed correctly in the source clip, this keeps it intact. For tutorials, interviews, and screen recordings, that usually matters more than filling every pixel.
**Crop to Fill** is a common choice. It fills the 16:9 frame, but it does that by cutting away part of the image. For social clips with text overlays, hooks, and title cards near the edges, that can ruin the shot fast.
**Ken Burns** is often overlooked. In short-form editing, it can be useful for a subtle push-in on a talking head, product shot, or screenshot. Used lightly, it adds motion without creating a jump cut. Used heavily, it feels dated.
A quick visual walkthrough helps here:
### When cropping hurts quality
There's another trade-off that matters on Mac. **Cropping reduces resolution** because iMovie resamples the visible portion of the clip rather than masking the edges. A 4K clip cropped aggressively inside a 4K project can effectively end up looking more like a lower-resolution crop, such as 1080p or 720p, and that quality loss stays in the export, as discussed in [this iMovie cropping thread covering resolution loss](https://www.reddit.com/r/iMovie/comments/zx91r6/how-does-imovie-mac-handle-cropping-video/).
> For short-form social edits, a slight crop usually holds up. A heavy punch-in often doesn't, especially once captions, compression, and platform re-encoding stack on top.
A practical Mac workflow looks like this:
- **Use Fit first** when testing composition
- **Reserve Crop to Fill** for clips with extra resolution headroom
- **Keep text away from edges** before doing reframes
- **Use Ken Burns sparingly** for attention, not as a default move
If the job requires repeated reframing for TikTok, Reels, Shorts, and LinkedIn, iMovie starts to feel slow. Every crop becomes manual, and every resize decision has to be checked by eye.
## How to Crop Videos in iMovie on iPhone and iPad
The iPhone and iPad version of iMovie is quick, which is why many creators use it for drafts, fast social clips, and simple trims on the go. The downside is precision. Instead of proper crop handles, the app relies on touch gestures.
### The mobile crop workflow
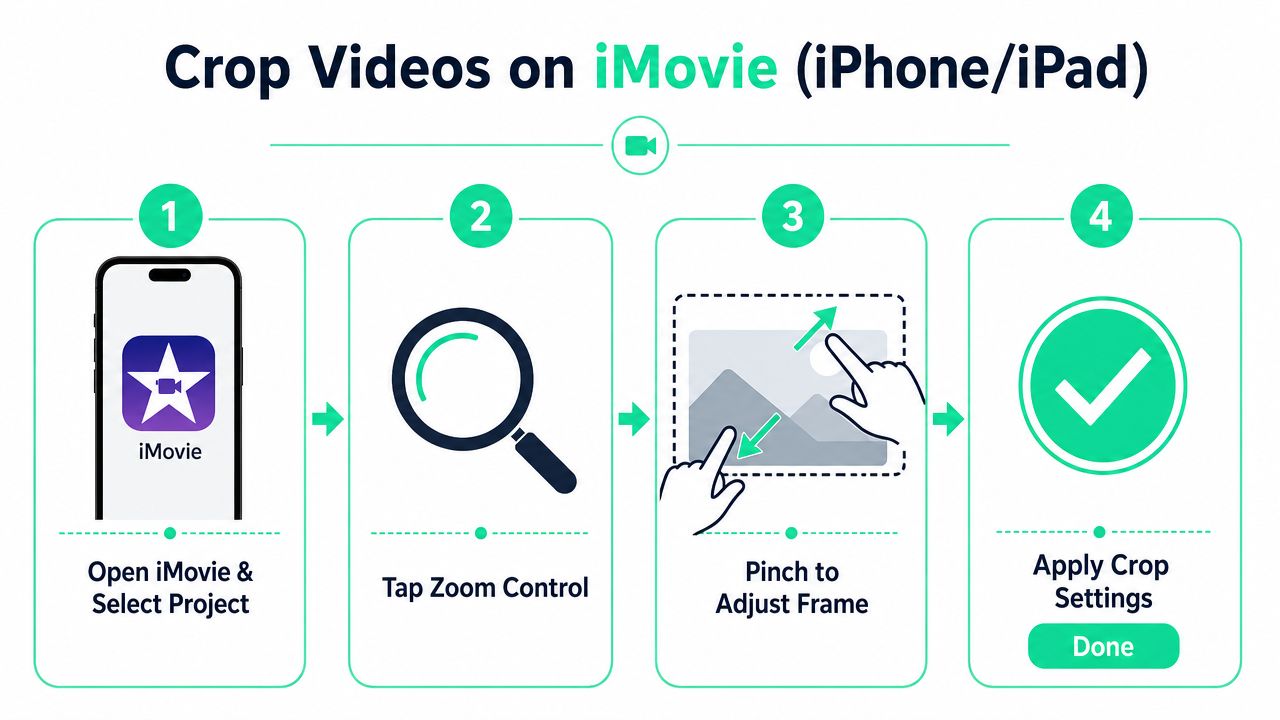
To crop videos in iMovie on iPhone or iPad:
- **Open the project:** Launch iMovie and select the video project to edit.
- **Tap the clip:** In the timeline, select the clip that needs reframing.
- **Use the zoom control:** Tap the preview, then use the gesture controls available for the clip.
- **Pinch to adjust:** Move two fingers inward or outward to zoom and reposition the visible frame.
- **Apply the crop:** Confirm the change once the framing looks right.
This mobile workflow is simple, but it isn't exact. On iPhone and iPad, the pinch-to-zoom tool replaces dedicated crop handles, and that lack of precision has been linked to a **40% failure rate in centered subject alignment for tutorial videos**, with users often exporting **2–3 times** to fix small framing mistakes, according to [this iMovie mobile cropping guide](https://www.animaker.com/hub/how-to-crop-a-video-on-imovie/).
### How to get cleaner framing on touchscreens
The best mobile results usually come from changing the editing habit, not from expecting more from the tool.
First, zoom less than feels necessary. Heavy zoom magnifies every small hand movement and makes the frame drift off-center. Second, pause on the most important moment in the shot before adjusting. If the subject moves during the clip, center for the key beat, not the first frame.
A few habits help:
- **Frame for faces first:** If it's a talking-head clip, protect eyes and mouth before background details.
- **Check captions area:** Leave room at the bottom if subtitles or burned-in captions will be added later.
- **Preview full screen:** Tiny misalignments are easy to miss in the edit view.
- **Redo early:** If the crop feels slightly off, fix it before adding more edits.
> A mobile crop that looks “close enough” in the editor often looks obviously off once the video is exported and viewed vertically.
For more practical phone editing workflows beyond cropping, the [BlitzReels guide to editing videos on iPhone](https://www.blitzreels.com/blog/how-to-edit-videos-on-iphone) is a useful reference point.
## The Ultimate Workaround for Vertical Video in iMovie
Anyone trying to publish vertical social clips from iMovie eventually runs into the same wall. iMovie doesn't offer a normal switch for 9:16 or 1:1 projects. The only reliable workaround is the **dummy clip method**, which is clever, usable, and fragile all at once.
### How the dummy clip method works
The idea is to force iMovie to inherit project orientation from the first clip on the timeline.
The workflow looks like this:
1. Create or export a true vertical clip outside iMovie. A simple vertical slide from Keynote works.
2. Import that clip into iMovie.
3. Place it as the **first item** in the timeline.
4. Add your actual clips after it.
5. Build the edit.
6. Remove or trim away the dummy portion once the project orientation is established.
7. Export using the correct output option.
This workaround has been shown in tutorials where using **App Preview** instead of **Export File** produced full **1080×1920** vertical output, and the method was described with a **95% success rate** when set up correctly. The same walkthrough also notes a **70% error rate** in orientation reset if the first clip isn't genuinely vertical or if timeline order gets disrupted, as shown in [this vertical iMovie workaround video](https://www.youtube.com/watch?v=K3ljUvNokPg).
> The first clip matters more than anything else in this setup. If that clip is wrong, the whole project falls back into iMovie's normal behavior.
### Where this workaround breaks
Here, iMovie stops feeling like a light editor and starts feeling like a workaround machine.
A few failure points show up repeatedly:
- **Wrong first clip:** A clip that only looks vertical but isn't encoded that way won't hold orientation.
- **Timeline reordering:** Moving or undoing the first clip can break the project setup.
- **Wrong export path:** Choosing the standard export option can undo the effort.
- **Overlay limitations:** Extra assets often need preparation before import.
That last point is important for short-form creators. Social videos often need reframing, clipping, caption-safe spacing, title cards, and resized overlays. iMovie can get there, but the path is clunky. Instead of native presets for TikTok, Reels, Shorts, or LinkedIn, it asks the editor to trick the timeline into behaving differently.
For anyone still using it, the [BlitzReels iMovie guide](https://www.blitzreels.com/blog/how-to-use-imovie) is a practical companion for the broader workflow around importing, arranging, and exporting clips.
## Advanced Cropping Tips and Common Problems
Basic cropping is only half the battle. The bigger frustrations usually show up after the first edit, when overlays don't fit, exported clips still look zoomed, or a shot loses sharpness after what seemed like a small adjustment.
### Cropping Picture in Picture overlays
Picture-in-Picture is one of iMovie's weakest spots for social editing. That matters because short-form creators use overlays for reactions, tutorials, B-roll cutaways, side-by-side commentary, and face-cam framing all the time.
There isn't a clear built-in path for cropping PiP overlays to non-16:9 ratios inside iMovie. The common workaround is to pre-crop the overlay clip in Photos, export it to Finder, then import it back into iMovie as an overlay. An analysis of tutorial coverage found that only **12% of tutorial videos on PiP cropping** addressed this limitation, according to [this MacMost page on iMovie PiP cropping limits](https://macmost.com/cropping-imovie-picture-in-picture-overlays.html).
The practical sequence is:
1. Open the overlay clip in **Photos**.
2. Crop it there first.
3. Export the edited version to **Finder**.
4. Import that new file into iMovie.
5. Add it as a Picture-in-Picture overlay.
That isn't elegant, but it works more reliably than trying to force the overlay shape inside iMovie.
> If an overlay needs custom framing, it's usually faster to prep it before the edit than to fight iMovie after the fact.
### Quick fixes for the problems that keep coming back
A few problems appear so often that they're worth keeping in one checklist.
- **Video still looks zoomed in:** Check whether the clip is set to **Crop to Fill** instead of **Fit**.
- **Black bars appear after export:** The clip and project probably don't share the same shape, and iMovie preserved the full frame.
- **Text gets cut off:** The crop was applied before checking title-safe spacing.
- **The image looks softer:** The crop was too aggressive for the source resolution.
- **The frame feels inconsistent across clips:** Each shot was cropped manually instead of using a repeatable visual reference.
For creators regularly switching between widescreen, square, and vertical outputs, a dedicated [video aspect ratio converter workflow](https://www.blitzreels.com/blog/video-aspect-ratio-converter) is often easier than patching iMovie clip by clip.
## Beyond iMovie A Faster Way to Create Social Clips
iMovie still has a place. It's free, familiar, and capable for basic edits. For a quick 16:9 project on a Mac, it can trim clips, add simple titles, apply light crops, and get a video out the door without much setup.
### Where iMovie still works well
It's a reasonable option when the edit is simple:
- **Basic widescreen videos:** Talking heads, home videos, and quick internal updates
- **Light reframing:** Small crop corrections on high-resolution footage
- **Beginner edits:** Simple timelines, transitions, and title cards
That's different from a modern short-form workflow. Social clips usually need native vertical sizing, quick clipping, reusable templates, hooks in the first seconds, bold captions, reframing across platforms, and fast edits that don't require a lot of manual correction.
### When a dedicated short form workflow makes more sense
That's where AI-assisted workflows start saving real time. Creators using **AI-powered transcription and text-based editing** can cut editing time by **approximately 50%**, reducing the record-edit-publish loop from hours to about ten minutes, according to [this overview of transcript-based editing workflows](https://www.amberfiglow.com/blog/streamline-video-workflow).

That shift matters because short-form editing is rarely just “crop the frame.” It's usually a stack of tasks: cut dead air, pull a hook, add captions, resize for platform specs, reframe the speaker, drop in title cards, and export clean versions for multiple channels. A workflow built around those needs is clearly faster than forcing a general consumer editor into a social-first job.
For creators who need platform-ready outputs, a dedicated [resize video tool](https://www.blitzreels.com/tools/resize-video) makes more sense than repeating the same manual crop decisions in every project.
---
BlitzReels is built for the exact workflow that makes iMovie feel slow. It helps creators clip, caption, resize, reframe, and repurpose videos for TikTok, Instagram Reels, YouTube Shorts, LinkedIn, and other social platforms without wrestling with 16:9-only projects or fragile export hacks. If the goal is to turn raw footage into polished short-form content faster, [BlitzReels](https://blitzreels.com) is the cleaner next step.