---
title: "How to Clip Video for Short-Form Engagement"
canonical: "https://blitzreels.com/blog/how-to-clip"
---
# How to Clip Video for Short-Form Engagement
URL: https://blitzreels.com/blog/how-to-clip
Markdown URL: https://blitzreels.com/blog/how-to-clip.md
Published: 2026-08-10
Author: BlitzReels
Learn how to clip video for short-form content with step-by-step workflows, platform specs, captions, hooks, and AI tools like BlitzReels.
Tags: how to clip, video clipping, short-form content, BlitzReels, social video

You've got a folder full of usable footage, a deadline looming, and a blank caption field staring back at you. One export needs to work for TikTok, another for Reels, another for Shorts, and the clock keeps moving while the best moments stay buried in the middle of the recording. **How to clip** becomes a workflow problem long before it becomes an editing problem.
## Table of Contents
- [Introduction to Efficient Clipping](#introduction-to-efficient-clipping)
- [Plan Your Clipping Workflow](#plan-your-clipping-workflow)
- [Start with the platform, not the footage](#start-with-the-platform-not-the-footage)
- [Use a brief that reduces guesswork](#use-a-brief-that-reduces-guesswork)
- [Choose High Impact Moments](#choose-high-impact-moments)
- [Test whether the clip stands alone](#test-whether-the-clip-stands-alone)
- [Let automation find candidates, then prune hard](#let-automation-find-candidates-then-prune-hard)
- [Trim Clips and Apply Style](#trim-clips-and-apply-style)
- [Cut for momentum first](#cut-for-momentum-first)
- [Reframe, caption, and package the clip](#reframe-caption-and-package-the-clip)
- [Export for TikTok Reels and Shorts](#export-for-tiktok-reels-and-shorts)
- [Match the export to the platform](#match-the-export-to-the-platform)
- [Use presets that protect the hook](#use-presets-that-protect-the-hook)
- [Best Practices and Repurposing Strategies](#best-practices-and-repurposing-strategies)
- [Repurpose one strong cut in multiple ways](#repurpose-one-strong-cut-in-multiple-ways)
## Introduction to Efficient Clipping
A lot of creators know the pain well. A long webinar ends, the transcript is open, and the next post still has to be cut, captioned, reframed, and exported before the audience scrolls past. The slow part usually isn't the final polish, it's the indecision, because every extra scrub through the timeline makes it harder to find a clean hook.
Efficient clipping solves that by splitting the job into smaller editorial choices. First comes the platform, then the moment, then the trim, then the packaging. That order matters because it keeps the editor from trying to solve everything at once, especially when the same source needs to work as a vertical clip, a square variant, or a repackaged short with captions and a stronger opening.
Creators who move faster usually don't rely on one giant pass through the timeline. They use a repeatable sequence, then let AI help with detection, transcription, reframing, and captioning where that saves time. That's the practical lane for teams trying to publish more short-form without turning every post into a full editing session.
## Plan Your Clipping Workflow
### Start with the platform, not the footage
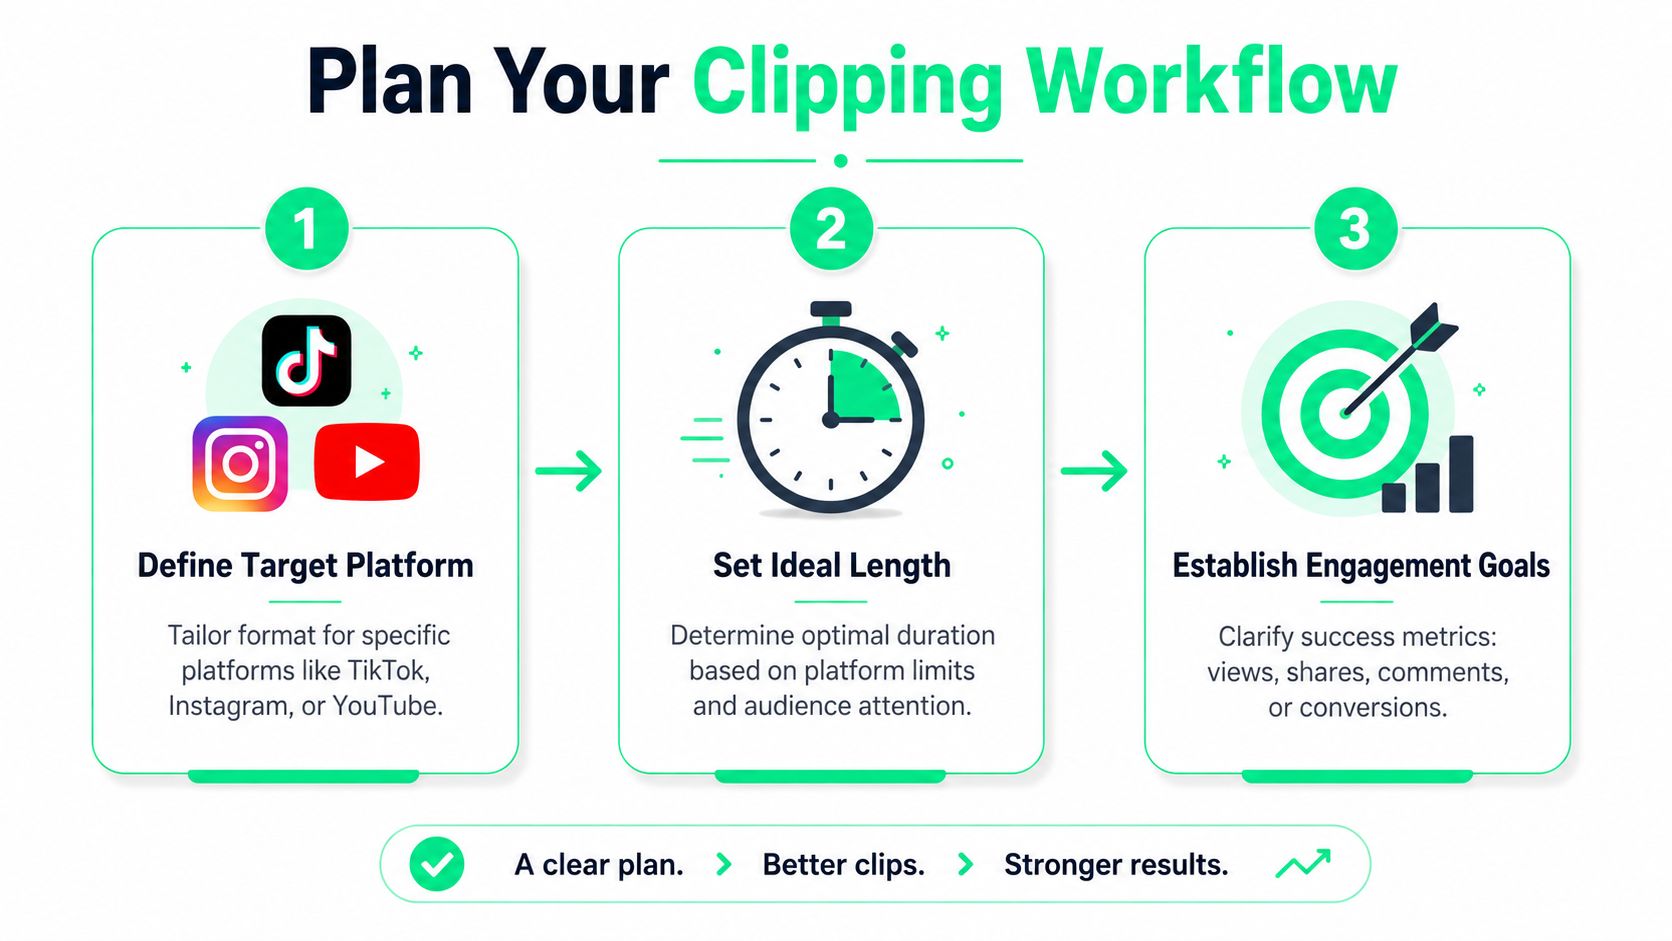
The cleanest clipping workflow starts before the timeline opens. Define the destination first, because a TikTok short, a LinkedIn post, and a YouTube Short don't want the same pacing, framing, or on-screen text. A source that might become three clips needs three editorial decisions up front, not one vague idea that gets rewritten in the editor.
A practical sequence is to **define the platform and target length first**, then scan for a **hook → value → payoff** structure, and only after that trim aggressively by removing greetings, filler phrases, breaths, long pauses, and repeated sentences. That order is recommended because it forces one editorial decision at a time and helps keep clips optimized for **short-form retention**. [ReelsBuilder's beginner clipping guide](https://reelsbuilder.ai/blog/complete-guide-to-video-clipping-for-beginners) lays out that sequencing clearly.
A useful brief keeps those choices visible. The strongest version usually includes timestamped highlights, a few hook directions, a do-and-do-not list, and explicit payout controls such as CPM, total budget, and caps. When those limits are hidden or vague, creators waste time guessing what matters most, and the assignment becomes harder to judge.
### Use a brief that reduces guesswork
A good clipping brief doesn't need to be long. It needs to be specific enough that the person cutting the clip can make decisions without waiting for constant approval. Timestamped highlights show where the strongest moments live, and hook examples tell the editor whether the angle should feel surprising, useful, or opinionated.
> **Practical rule:** one decision per pass keeps the edit moving. If the platform is unclear, the length gets fuzzy. If the length is unclear, the hook loses shape. If the hook is unclear, the clip starts drifting.
That's where a planning tool helps. A structured planner such as [BlitzReels's back catalog clip planner](https://www.blitzreels.com/guide/back-catalog-clip-planner) fits naturally into this stage because it organizes older footage into reusable highlights instead of forcing a fresh search every time.
The win here is not just speed, it's consistency. Once the workflow is set, the editor stops reinventing the process for each post. The clip starts as a decision tree, not as a pile of timestamps.
## Choose High Impact Moments
### Test whether the clip stands alone
A clip should make sense even if the viewer has never seen the full video. That's the first filter. If the setup depends on three minutes of context, the cut is probably too inside-baseball for short-form unless the editor can reshape the opening.
The strongest moments usually answer three questions quickly. Does the opening line create tension or curiosity right away. Can the payoff land cleanly without extra explanation. And does the segment still make sense after the editor strips away the surrounding context. Those are the checks that [Klap's clipping guide](https://klap.app/blog/how-to-clip) uses to screen long-form material before cutting.
That same approach works across podcasts, interviews, webinars, and educational videos. A podcast clip often succeeds when a speaker makes a sharp claim in the first sentence. A webinar clip works better when the host answers a question directly instead of wandering through the intro. Educational footage is strongest when the takeaway is obvious before the clip ends, not after a caption thread explains it.
### Let automation find candidates, then prune hard
A hybrid workflow makes the search faster. Feed in strong source footage, let the system generate candidate clips, and remove the ones that sound dramatic but don't resolve. Then tighten the endpoint or the framing a little, because a tiny trim at the start or end can materially improve momentum.
That last part often goes underestimated. A clip can have the right idea and still feel slow because the first half-second drags or the ending lands a beat late. Small endpoint trims often fix that without changing the substance, which is why the best editors treat the candidate clip as a draft, not a finished asset.
> The best clips don't just contain a good moment, they enter fast, stay legible, and leave before the energy drops.
For teams managing larger libraries, [BlitzReels's highlight detection glossary](https://www.blitzreels.com/glossary/highlight-detection) fits neatly into this stage because it aligns with the same selection logic, surfacing moments before the manual polish begins.
## Trim Clips and Apply Style
### Cut for momentum first
Once the moment is chosen, the trim should be ruthless. Drop greetings, filler words, repeated phrases, long pauses, breaths, and any sentence that says what the clip already said. The goal is not to make the speaker sound robotic, it's to remove the dead air that slows the viewer before the value lands.
That's why a simple trimming utility is useful even before advanced packaging. A **[Simple video trimming solution](https://vitelnk.com/tools/edit/free-video-trimmer)** can handle quick cleanup when the job is mainly about removing drag, not redesigning the whole clip. For a more integrated pass, [BlitzReels's trim video tool](https://www.blitzreels.com/tools/trim-video) fits into a faster clip workflow because it keeps the edit focused on shortening, tightening, and preparing the segment for short-form use.
There's a trade-off here. Aggressive cuts improve pace, but if every pause disappears, the speaker can sound unnatural. The cleanest result usually keeps just enough breathing room for the sentence to feel human while still moving fast enough for short-form attention spans.
### Reframe, caption, and package the clip
Style choices should support the edit, not hide weak footage. Auto-reframing helps keep faces centered when the source was shot wide, and small zooms can pull attention toward a key action or reaction. Captions do the heavy lifting in social feeds, especially when the viewer is skimming with the sound off.
This is also where title cards and caption presets help. A strong opening label can clarify the topic before the first spoken line lands, while bold on-beat captions keep the pace from feeling static. The editor should also choose aspect ratios with the destination in mind, because a clip that looks balanced in 1:1 may feel cramped in a vertical feed.
One practical detail separates polished clips from awkward ones. When reframing, the subject's eyes and hands should stay inside the visual center of the frame, especially if captions sit low. Tools like [BlitzReels's resize video for TikTok tool](https://www.blitzreels.com/tools/resize-video-for-tiktok) are useful here because they move the clip into platform-friendly framing without forcing a manual crop for every export.
## Export for TikTok Reels and Shorts
### Match the export to the platform
Export settings can undo good editing fast. A clip that's well cut but poorly sized can land with captions blocked, faces cropped, or opening text covered by interface elements. TikTok is the clearest example of that problem, because the source guidance says the short should open with a **hook in the first 1 to 2 seconds**, use **9:16 vertical video at 1080×1920**, and stay in the **15 to 60 seconds** range, with **under 30 seconds** tending to perform best for retention. It also says captions are essential because most TikTok videos are initially watched with sound off, and key visuals should stay out of the bottom **150 px** and side UI zones. [ClippingCulture's TikTok clipping guide](https://clippingculture.com/blog/how-to-start-clipping-on-tiktok) states those platform specifics plainly.
| Platform Export Specifications | Aspect Ratio | Resolution | Ideal Length | Safe Zones |
|---|---|---:|---|---|
| TikTok | 9:16 | 1080×1920 | 15 to 60 seconds, under 30 seconds often performs best for retention | Keep key visuals out of the bottom 150 px and side UI zones |
| Instagram Reels | 9:16 | Vertical export for phone-first viewing | Short-form pacing with captions and clean framing | Avoid UI overlap near the bottom and sides |
| YouTube Shorts | 9:16 | Vertical export | Short, direct, hook-first pacing | Keep important text away from the lower interface area |
| LinkedIn video | Flexible vertical or square depending on placement | Platform-friendly export | Short, readable, and captioned for silent viewing | Leave room for interface overlays |
### Use presets that protect the hook
The export preset should preserve readability before anything else. That means vertical framing where needed, captions burned in or properly attached, and clean spacing around the edges so UI elements don't crush the message. The safer habit is to preview the clip as if it were already live on the platform, because that's the only view that matters once the post ships.
> **Export rule:** if the hook sits too low, the interface wins. If the captions sit too tight to the edge, the viewer notices the crop instead of the message.
For workflow speed, the editor should keep a reusable preset for each destination. That avoids rechecking the same format choices on every post and makes it easier to scale a clip into multiple placements without starting from scratch.
## Best Practices and Repurposing Strategies
### Repurpose one strong cut in multiple ways
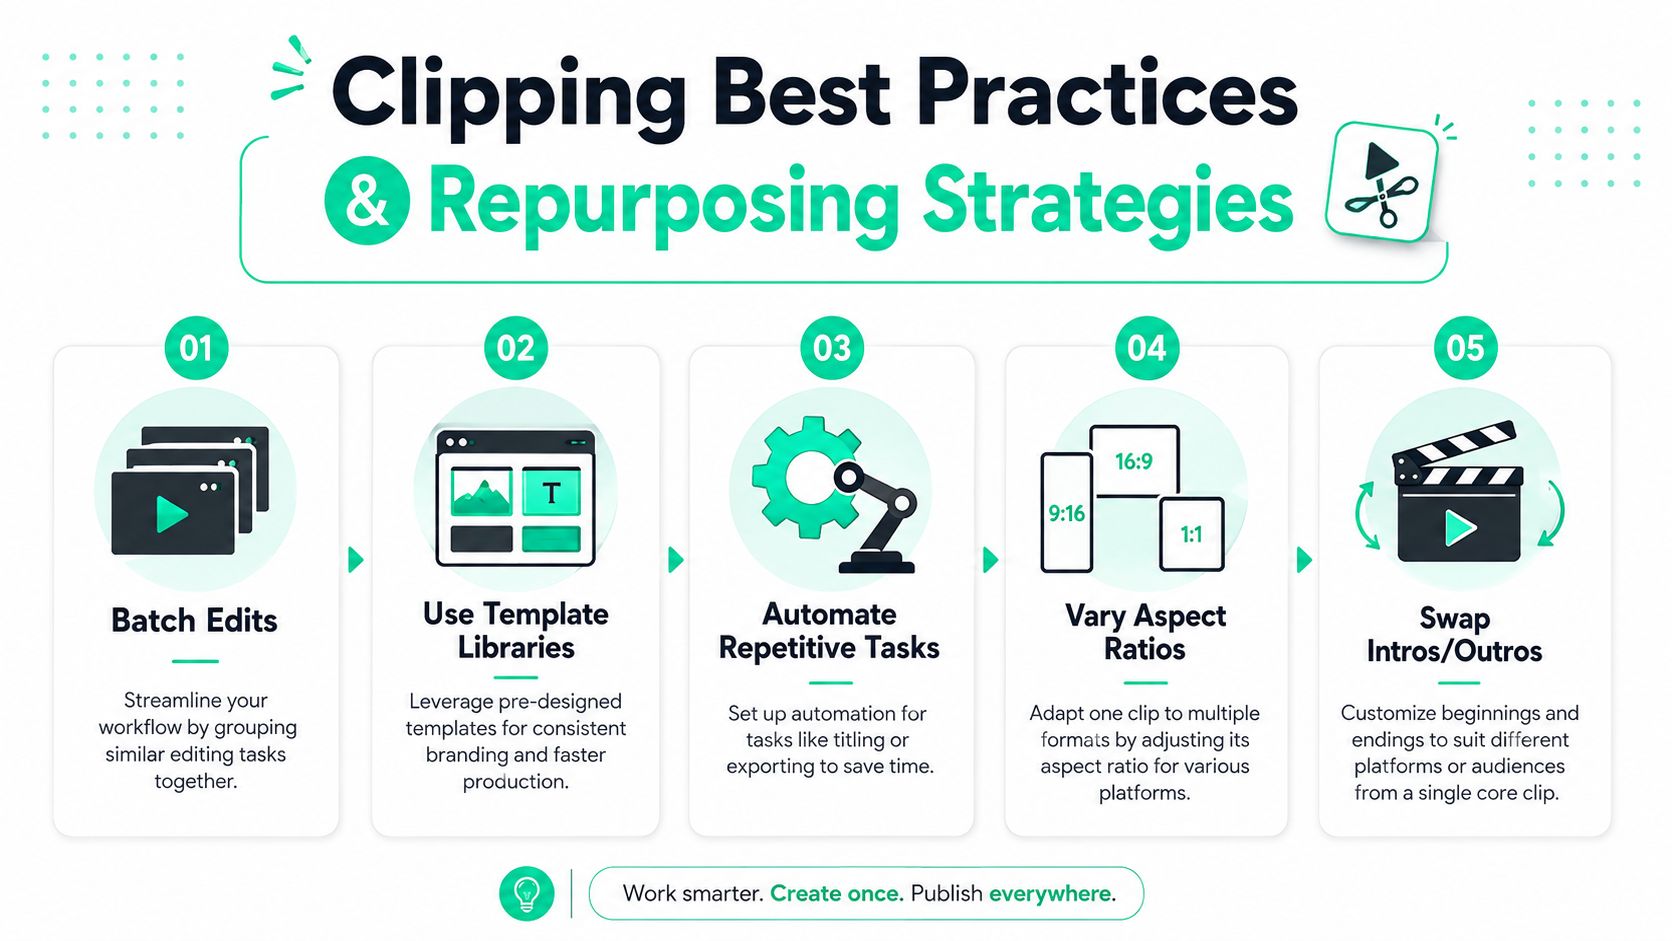
The same source clip can travel farther than many teams assume. Swap the intro, adjust the caption style, change the crop, or splice in a different B-roll layer and the clip starts feeling native to a new platform without a full rebuild. That's the key efficiency gain, one strong cut becomes several usable assets instead of one finished post.
Batching helps too. When similar edits get grouped together, the editor stays in one mental mode, which makes title cards, captions, and export choices faster to repeat. Template libraries do similar work by locking in a visual language, so the clip still feels branded even when the footage changes.
A repurposing workflow also benefits from tools that reduce repetition. [BlitzReels's guide to repurposing long videos with AI](https://www.blitzreels.com/blog/how-to-repurpose-long-videos-with-ai) fits this logic, because the same source can become multiple short-form outputs with different framing and caption treatment. For embedded distribution on sites, [embedding Instagram videos](https://own.page/blog/embed-instagram-video-on-website) can also help extend a clip beyond the feed when a post needs a home page or article placement.
The point is simple. Fast clipping isn't just about cutting faster, it's about creating a repeatable path from one source file to multiple published posts.
---
BlitzReels helps creators clip, caption, resize, and reframe short-form videos without rebuilding every post by hand. If the goal is faster TikTok, Reels, and Shorts production with cleaner hooks and platform-ready exports, visit [BlitzReels](https://blitzreels.com) and try the workflow on the next video.