---
title: "How to Clip a Zoom Recording for TikTok & Reels"
canonical: "https://blitzreels.com/blog/how-to-clip-a-zoom-recording"
---
# How to Clip a Zoom Recording for TikTok & Reels
URL: https://blitzreels.com/blog/how-to-clip-a-zoom-recording
Markdown URL: https://blitzreels.com/blog/how-to-clip-a-zoom-recording.md
Published: 2026-07-07
Author: BlitzReels
Learn how to clip a Zoom recording for social media. This guide covers finding files, native tools, free editors, and AI solutions for perfect TikToks & Reels.
Tags: how to clip a zoom recording, zoom to tiktok, repurpose video, short form video editing, blitzreels

A Zoom call ends, everyone leaves, and now the work starts. Somewhere inside that recording is a sharp answer, a clean demo moment, or a client sound bite that would work perfectly on TikTok, Instagram Reels, YouTube Shorts, or LinkedIn. The problem isn't whether the content exists. The problem is getting it out fast without turning a simple clip into an editing project that eats an afternoon.
That's why the effort to refine recordings often stalls. They either leave the clip buried in a full meeting recording, or they use Zoom's basic trimmer and stop there. That works if the only goal is to hide the awkward first minute. It doesn't work if the goal is a social-ready short with captions, a strong hook, proper framing, and a format that looks native on a phone screen.
## Table of Contents
- [Your Best Content Is Trapped in a Zoom Call](#your-best-content-is-trapped-in-a-zoom-call)
- [First Find Your Recording Cloud vs Local Files](#first-find-your-recording-cloud-vs-local-files)
- [Zoom cloud recordings](#zoom-cloud-recordings)
- [Local recordings on your computer](#local-recordings-on-your-computer)
- [Choosing Your Clipping Method From Simple to Smart](#choosing-your-clipping-method-from-simple-to-smart)
- [What Zoom's native tool does well](#what-zooms-native-tool-does-well)
- [Where free desktop editors help](#where-free-desktop-editors-help)
- [What breaks in a short-form workflow](#what-breaks-in-a-short-form-workflow)
- [The Fastest Way Clipping Zoom Recordings with AI](#the-fastest-way-clipping-zoom-recordings-with-ai)
- [Find moments from transcript instead of timeline](#find-moments-from-transcript-instead-of-timeline)
- [Build the clip for social from the start](#build-the-clip-for-social-from-the-start)
- [When AI clipping is the better choice](#when-ai-clipping-is-the-better-choice)
- [From Clip to Content Optimizing for TikTok Reels & Shorts](#from-clip-to-content-optimizing-for-tiktok-reels-and-shorts)
- [The finishing moves that change performance](#the-finishing-moves-that-change-performance)
- [What to add before publishing](#what-to-add-before-publishing)
- [Your Go-Forward Workflow for Repurposing Zoom Content](#your-go-forward-workflow-for-repurposing-zoom-content)
- [Choose the workflow that matches the goal](#choose-the-workflow-that-matches-the-goal)
## Your Best Content Is Trapped in a Zoom Call
A familiar scenario plays out every week. A founder finishes a webinar, a coach wraps a client session, or a marketer records a product walkthrough. The full call is long, but one short stretch is excellent. It answers a painful question, lands a memorable phrase, or explains something in a way that would stop a scroll.
That clip usually stays trapped because the extraction process feels heavier than it should. Download the file. Open an editor. Scrub through dead air. Guess the in-point. Guess the out-point. Export. Then realize the framing is wrong for vertical, the captions are missing, and the opening has no hook. A fast job turns into several small jobs stitched together.
> **Practical rule:** A useful Zoom clip isn't the same thing as a publish-ready short. Clipping is only the first step.
That's the gap most guides miss. They explain how to shorten a recording, not how to turn that recording into something people will watch on a social feed. Those are different tasks.
For internal sharing, rough clipping is often enough. For public distribution, rough clipping usually looks rough. A horizontal Zoom frame with no title card, no resizing, and no burnt-in captions rarely feels native on TikTok or Reels. Even when the spoken content is strong, the packaging slows it down.
A better workflow starts with a simple question. Is the goal just to extract a moment, or is the goal to create a short-form asset that can be reused across platforms? That decision changes which tool makes sense, how much precision matters, and whether native Zoom trimming is enough.
## First Find Your Recording Cloud vs Local Files
Before anyone can learn how to clip a Zoom recording, they need to know where Zoom saved it. That sounds basic, but it decides almost everything that follows. A cloud recording gives access to Zoom's built-in trim tool. A local recording gives direct access to the file, but editing happens somewhere else.
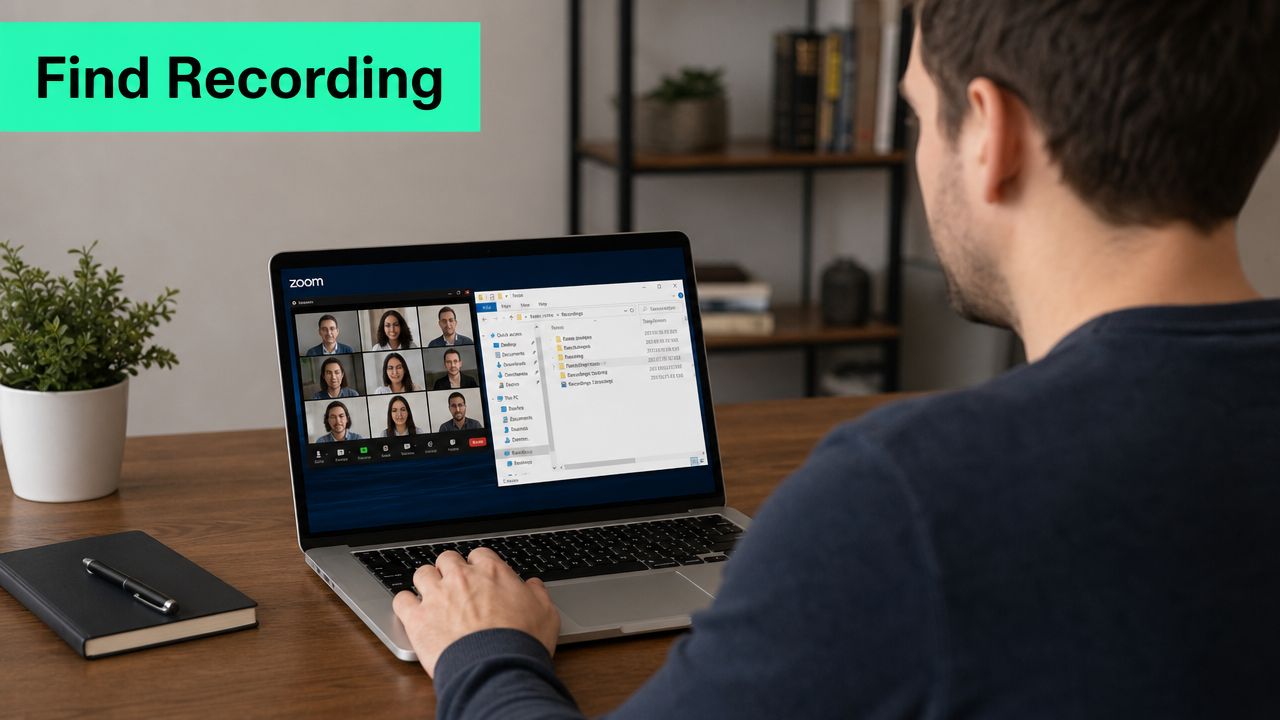
### Zoom cloud recordings
Cloud recordings live in the Zoom web portal. On supported institutional portals such as Harvard's and MIT's, the trim workflow is consistent: open the recording thumbnail in the web portal player, click the **Scissors** icon at the bottom right, then set the visible blue sliders to define the playback start and end points. The trim is playback-only, so the original content remains intact in Zoom cloud storage unless someone manually deletes it, as documented in [Zoom cloud recording trim guidance from Harvard](https://harvard.service-now.com/ithelp?id=kb_article&sys_id=23061224db1c14d496ab5682ca9619b9).
That non-destructive setup matters. It means a bad trim doesn't destroy the source recording. It also means cloud trimming is better for simple sharing than for serious repurposing.
A quick way to verify whether the recording is cloud-based is to check whether it appears in the Zoom portal under recordings and opens in the browser player. If it does, Zoom's trim feature is available without downloading.
### Local recordings on your computer
Local recordings are different. Zoom saves them directly to the computer as video files, usually inside a Zoom folder. These are the files a creator can move, upload, rename, archive, or edit in another app.
That's useful for social workflows because local files are easier to push into desktop editors, online editors, and clipping tools. If the file opens as an MP4 or MOV, it can move into a more flexible pipeline. If there's a format issue, this quick guide on [how to play MOV files](https://www.blitzreels.com/blog/play-mov-files) helps sort that out before editing starts.
> Cloud recording means convenience. Local recording means control.
The best next step depends on the outcome. If someone only needs to hide setup chatter or trim the ending, cloud is often enough. If the goal is a polished short with reframing, captions, templates, and resizing, the local file is usually the better starting point.
## Choosing Your Clipping Method From Simple to Smart
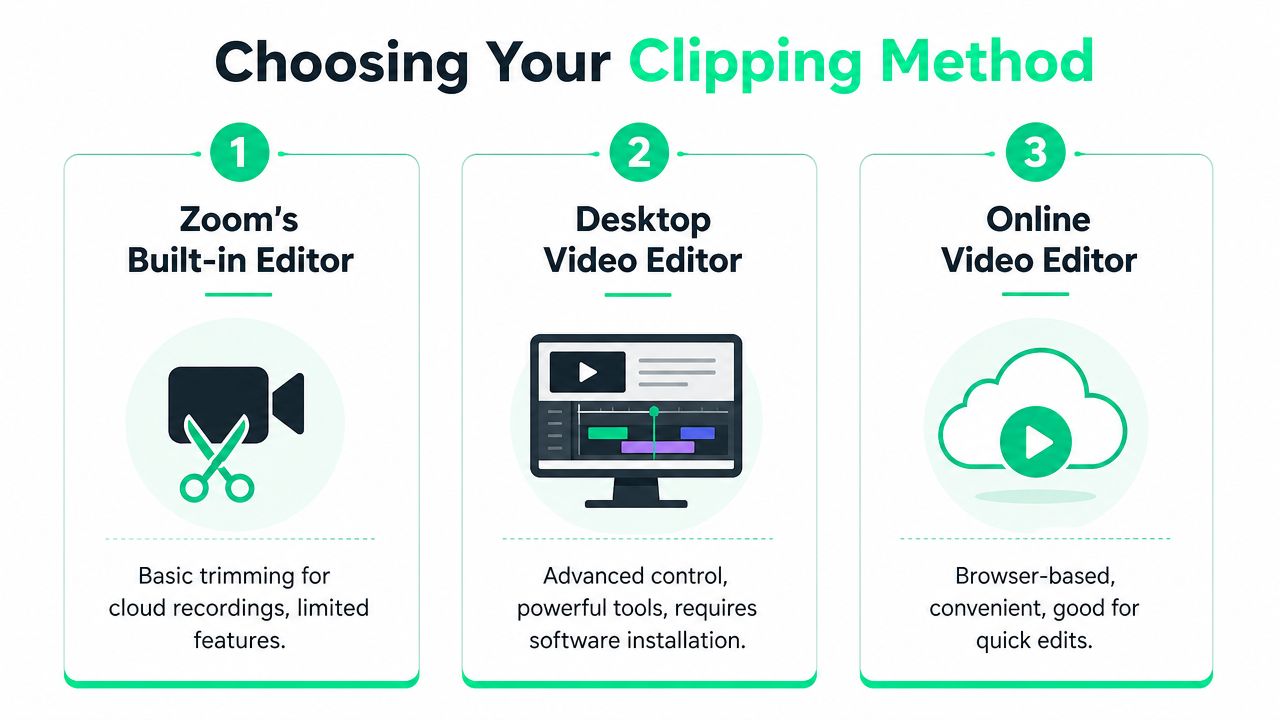
Some tools are fine for rough cuts. Some are fine for precise cuts. Very few are good at both clipping and preparing a social-ready short. That's why choosing the right method early matters.
### What Zoom's native tool does well
Zoom's built-in trimmer is the fastest option for basic cleanup on a cloud recording. It uses blue sliders to set a playback range and doesn't alter the original MP4 file. That makes it safe for quick edits, especially when a team wants to share a shorter replay without touching the source file. Tufts notes that the editor is non-destructive and also points out a frequent mistake: failing to click the secondary confirmation prompt causes **15% of users** to lose or miss their intended trim in practice, according to [Tufts' Zoom trimming guide](https://tuftsedtech.screenstepslive.com/s/19028/m/94934/l/1230872-how-do-i-trim-the-start-or-end-of-my-zoom-cloud-recording).
It also supports more than a single front-and-back trim. On supported Zoom workflows, users can add multiple non-contiguous trim sections by hovering over non-trimmed areas and clicking the plus icon, then remove sections if needed. That's better than often expected from Zoom.
Still, the tool has obvious limits. It isn't built for title cards, social captions, punchy hooks, or reframing a speaker into a vertical format. It clips. It doesn't package.
### Where free desktop editors help
For local files, free desktop options can work. QuickTime on Mac and the Photos app on Windows are fine for simple start-and-end extraction. They're accessible, familiar, and good enough when speed matters more than presentation.
Dedicated free tools add more control. MPEG Streamclip, for example, allows manual in and out points using keyboard shortcuts. The workflow is more exacting: scrub to the right frame, press **I** for the in-point, set the out-point with the matching shortcut, then export through **File > Export to MPEG4**. For quality preservation, the export settings should use **100% quality**, **H.264**, and an **unscaled** frame size, based on the workflow described in [this MPEG Streamclip clipping walkthrough](https://engagevideomarketing.com/how-to-edit-zoom-videos-for-social-media-no-editing-skills-or-software-required/).
That said, free desktop editing has a cost. The interface is often dated, the export settings are easy to mishandle, and every extra step creates another chance to lose momentum.
### What breaks in a short-form workflow
The biggest problem isn't clipping. It's everything after clipping.
A manually extracted horizontal clip still needs:
- **Resizing for vertical feeds** so it doesn't look like a webinar shoved into a phone screen
- **Captions burned into the video** so it works in sound-off viewing
- **Reframing** to keep the speaker centered instead of tiny
- **A stronger opening** such as a title card or hook line
- **Reusable styling** so the next clip doesn't start from zero
That's where basic editors lose. They can produce a file, but they don't remove the repetitive labor around short-form publishing. For creators handling frequent content, a purpose-built [video clipping workflow](https://www.blitzreels.com/clipping) is usually more practical than stitching together trimming, captioning, resizing, and export by hand.
> The clunky part usually isn't getting a clip out of Zoom. The clunky part is making that clip feel native everywhere else.
## The Fastest Way Clipping Zoom Recordings with AI
Manual clipping makes sense when the volume is low. It breaks down when there are multiple calls, multiple platforms, and a steady need for publishable shorts. That's where AI workflows earn their place.
### Find moments from transcript instead of timeline
The old workflow starts on the timeline. That's slow because timelines hide meaning inside waveforms and tiny thumbnails. A transcript-first workflow is faster because people can spot usable moments by reading the actual words.
For Zoom content, that matters a lot. Webinars, interviews, demos, and client calls usually contain several good hooks, but they're buried between setup, transitions, and filler. With transcript-driven clipping, the editor can locate a strong statement, highlight the useful passage, and cut around it instead of scrubbing minute by minute.
That's also where outside AI tools can help in adjacent parts of the workflow. For teams exploring broader automation around repurposing and content operations, [BuddyPro's specialized AI](https://buddypro.ai/for-ai) is a useful example of how focused AI systems can reduce repetitive production work.
### Build the clip for social from the start
A raw Zoom excerpt doesn't automatically become a strong Reel or Short. A better workflow treats clipping and formatting as one continuous task.
That means the editor should be able to do the following in one pass:
1. **Select the strongest hook** from the transcript
2. **Trim tightly** so the clip starts on the idea, not the preamble
3. **Add captions** that are readable and styled for social viewing
4. **Reframe the subject** for vertical output
5. **Resize for platform fit** without rebuilding the edit every time
A dedicated AI clipping tool does this better than a stack of disconnected free apps. The transcript becomes the editing surface. The framing adjusts for phone-first viewing. Templates speed up consistency. A title card can carry the promise of the clip before the speaker even finishes the first sentence.
That's the shift. Instead of asking how to clip a Zoom recording and then figuring out captions, resizing, and visual polish later, the workflow handles those needs together. This breakdown of an [AI video clipping tool workflow](https://www.blitzreels.com/blog/ai-video-clipping-tool) is useful for seeing how transcript-based editing changes the pace of repurposing.
### When AI clipping is the better choice
AI isn't necessary for every edit. It is usually the better choice when any of these are true:
- **The recording is long:** Long webinars and interviews punish timeline-only editing.
- **The team publishes often:** Repeated manual formatting creates bottlenecks.
- **Multiple platforms matter:** TikTok, Reels, Shorts, and LinkedIn all reward phone-friendly presentation.
- **Consistency matters:** Templates, recurring title cards, and repeatable caption styles save time.
- **Several clips need to come from one call:** One source recording often contains multiple usable moments.
> Strong short-form workflows don't just cut video. They surface hooks, format for feeds, and reduce repeat labor.
The practical trade-off is simple. Manual tools are cheaper in effort only when the job is tiny. Once the goal includes clipping, captioning, resizing, and reframing at any real volume, AI becomes the cleaner path.
## From Clip to Content Optimizing for TikTok Reels & Shorts
A clipped video can still fail on social if it looks like a meeting recording. The final formatting is what turns a usable excerpt into content people will watch on a phone.
### The finishing moves that change performance
The first adjustment is aspect ratio. A standard Zoom frame is built for desktop viewing. TikTok, Reels, and Shorts are built for vertical screens. A clip needs reframing, not just resizing, so the speaker stays central and the composition doesn't look accidental.
The second adjustment is captions. For short-form distribution, captions aren't decoration. They're functional. A Zoom clip intended for TikTok or Reels should be **less than 60 seconds** and should include automatic transcription with **burnt-in captions** to suit sound-off viewing, based on the process described in [this short-form repurposing walkthrough](https://www.youtube.com/watch?v=T7ORBpCQPF0).
> A good social clip should still make sense with the sound off.
### What to add before publishing
A short-form Zoom clip usually needs a few finishing elements before export:
- **A hook in the opening seconds:** A title card or bold first line gives the viewer a reason to stay.
- **Caption styling that feels native:** Plain subtitle files don't carry the same weight as designed, on-screen captions.
- **Tighter framing:** A speaker's face should feel intentional, not lost inside a full desktop capture.
- **Platform-aware sizing:** One clip may need different crops or layouts depending on where it's going.
Some creators also use square formatting for feeds like LinkedIn or Instagram and vertical formatting for Reels. That's a design decision, not just an export setting. Templates help, because they keep title cards, captions, and framing consistent across batches of content. For anyone building a repeatable posting system, this guide to [short-form video workflows](https://www.blitzreels.com/blog/short-form-video) is a practical next read.
The common mistake is treating Zoom footage like finished footage. It isn't. It's source material. Once that mindset changes, the editing decisions get easier.
## Your Go-Forward Workflow for Repurposing Zoom Content
There isn't one perfect method. There's a right method for the outcome.
### Choose the workflow that matches the goal
If the task is internal sharing, Zoom's built-in cloud trimmer is often enough. It's quick, safe for the original file, and useful for hiding dead space at the beginning or end.
If the task is a one-off excerpt from a local file, a free editor can work. It takes more effort, but for occasional use, that trade-off is manageable.
If the task is ongoing short-form publishing, the smarter move is a workflow built around clipping, captions, resizing, reframing, and fast iteration. That's how a meeting archive turns into a content engine instead of a storage problem. The same logic applies to broader repurposing strategy too. Teams that [boost SEO with repurposed content](https://www.outrank.so/blog/what-is-content-repurposing) usually treat one source asset as the starting point for several formats, not the end product.
A long webinar, customer interview, or product demo can become multiple shorts when the workflow supports that. This approach to [turning long video into shorts](https://www.blitzreels.com/blog/turn-long-video-into-shorts) fits that exact use case.
The most useful takeaway is simple. Don't stop at trimming. Extract the moment, package it properly, and publish it in a format that matches how people watch.
---
BlitzReels is built for that exact jump from raw recording to polished short-form video. Upload a Zoom file, turn strong moments into clips, add bold captions, resize for TikTok, Reels, YouTube Shorts, or LinkedIn, and move from editing to posting without getting buried in a timeline. Explore [BlitzReels](https://blitzreels.com) if the goal is faster clipping, cleaner formatting, and a repeatable short-form workflow.