---
title: "How to Compress MP4 Video Without Losing Quality"
canonical: "https://blitzreels.com/blog/how-to-compress-mp-4-video"
---
# How to Compress MP4 Video Without Losing Quality
URL: https://blitzreels.com/blog/how-to-compress-mp-4-video
Markdown URL: https://blitzreels.com/blog/how-to-compress-mp-4-video.md
Published: 2026-05-14
Author: BlitzReels
Discover how to compress MP4 video files without losing quality. Master HandBrake, FFmpeg, online tools, and AI for stunning TikTok & Reels content.
Tags: how to compress mp4 video, video compression, mp4 compressor, short form video, file size reduction

You export a video, feel good about the edit, and then the upload stalls because the MP4 is too big. Or worse, the platform accepts it, crushes it with another round of compression, and your sharp captions, face crop, and hook shot come back looking soft and blocky.
That's why learning **how to compress mp4 video** files matters. It isn't just about saving storage. It affects upload speed, playback on mobile, client handoff, and how clean your short-form content survives after TikTok, Instagram, or YouTube processes it again. Good compression protects the moments viewers notice first: text, faces, motion, and contrast.
Most creators don't need a film-school lecture on codecs. They need a workflow that gets the file smaller without wrecking the edit. Start with the manual approach so you know what the settings do. Then, if you automate later, you'll know whether the tool is helping or damaging your output.
## Table of Contents
- [Why Your MP4 Files Are Too Big and What to Do](#why-your-mp4-files-are-too-big-and-what-to-do)
- [What makes files balloon](#what-makes-files-balloon)
- [What to do first](#what-to-do-first)
- [Your First Compression with HandBrake and VLC](#your-first-compression-with-handbrake-and-vlc)
- [Why HandBrake is the easiest place to start](#why-handbrake-is-the-easiest-place-to-start)
- [A simple HandBrake workflow that works](#a-simple-handbrake-workflow-that-works)
- [When VLC is good enough](#when-vlc-is-good-enough)
- [What works and what doesn't](#what-works-and-what-doesnt)
- [Balancing Video Quality and File Size](#balancing-video-quality-and-file-size)
- [Resolution is your pixel count](#resolution-is-your-pixel-count)
- [Bitrate is your quality budget](#bitrate-is-your-quality-budget)
- [H264 versus H265](#h264-versus-h265)
- [A quick decision table](#a-quick-decision-table)
- [The order I'd adjust settings](#the-order-id-adjust-settings)
- [Precision Control with FFmpeg Command Line](#precision-control-with-ffmpeg-command-line)
- [A clean starting command](#a-clean-starting-command)
- [Resize while you compress](#resize-while-you-compress)
- [Two-pass when the file size really matters](#two-pass-when-the-file-size-really-matters)
- [When FFmpeg is the right tool](#when-ffmpeg-is-the-right-tool)
- [Compressing for TikTok Reels and YouTube Shorts](#compressing-for-tiktok-reels-and-youtube-shorts)
- [What social platforms care about](#what-social-platforms-care-about)
- [A practical export recipe for vertical shorts](#a-practical-export-recipe-for-vertical-shorts)
- [What usually goes wrong](#what-usually-goes-wrong)
- [The Fastest Method AI-Powered Compression](#the-fastest-method-ai-powered-compression)
- [Why manual compression stops scaling](#why-manual-compression-stops-scaling)
- [What AI compression actually improves](#what-ai-compression-actually-improves)
## Why Your MP4 Files Are Too Big and What to Do
MP4 is a container, not a promise that the file will be small. You can have one MP4 that uploads quickly and another that chokes your connection, even if both are the same length. The difference usually comes from what's inside: codec, bitrate, resolution, frame rate, and audio settings.
A common example. You shoot clean camera footage, add captions, export from Premiere or Final Cut at a high-quality preset, and end up with a file that looks great locally. But that export may be carrying far more data than a social platform needs. If the file is oversized, you wait longer to upload, your client waits longer to review, and the platform still recompresses it on arrival.
Compression isn't the enemy. Bad compression is.
The primary task is to remove waste without damaging the parts that matter. For short-form creators, that usually means preserving readable text, skin tones, motion around talking-head cuts, and enough detail that the platform's second encode doesn't make the video fall apart. If you want a quick grounding in the basics, this [video compression glossary](https://www.blitzreels.com/glossary/video-compression) is a useful reference.
### What makes files balloon
Three things usually cause the problem first:
- **High source quality:** Camera originals and high-quality exports carry a lot of information.
- **Overbuilt exports:** Many editing apps default to settings that are safer for master delivery than social upload.
- **Mismatch with destination:** A file made for archive, client review, and TikTok shouldn't all use the exact same settings.
> Compression should be treated like finishing, not cleanup. The best settings depend on where the file is going next.
### What to do first
Before touching settings, check these basics:
1. **Identify the destination.** Email attachment, client review, YouTube upload, and Instagram Reel each have different needs.
2. **Keep the best source you have.** Compress from the highest-quality final export available, not from a file that has already been compressed twice.
3. **Decide what can bend.** Usually bitrate can move first, then frame rate in some cases, then resolution if needed.
If you think about compression as delivery prep instead of quality loss, the choices get simpler.
## Your First Compression with HandBrake and VLC
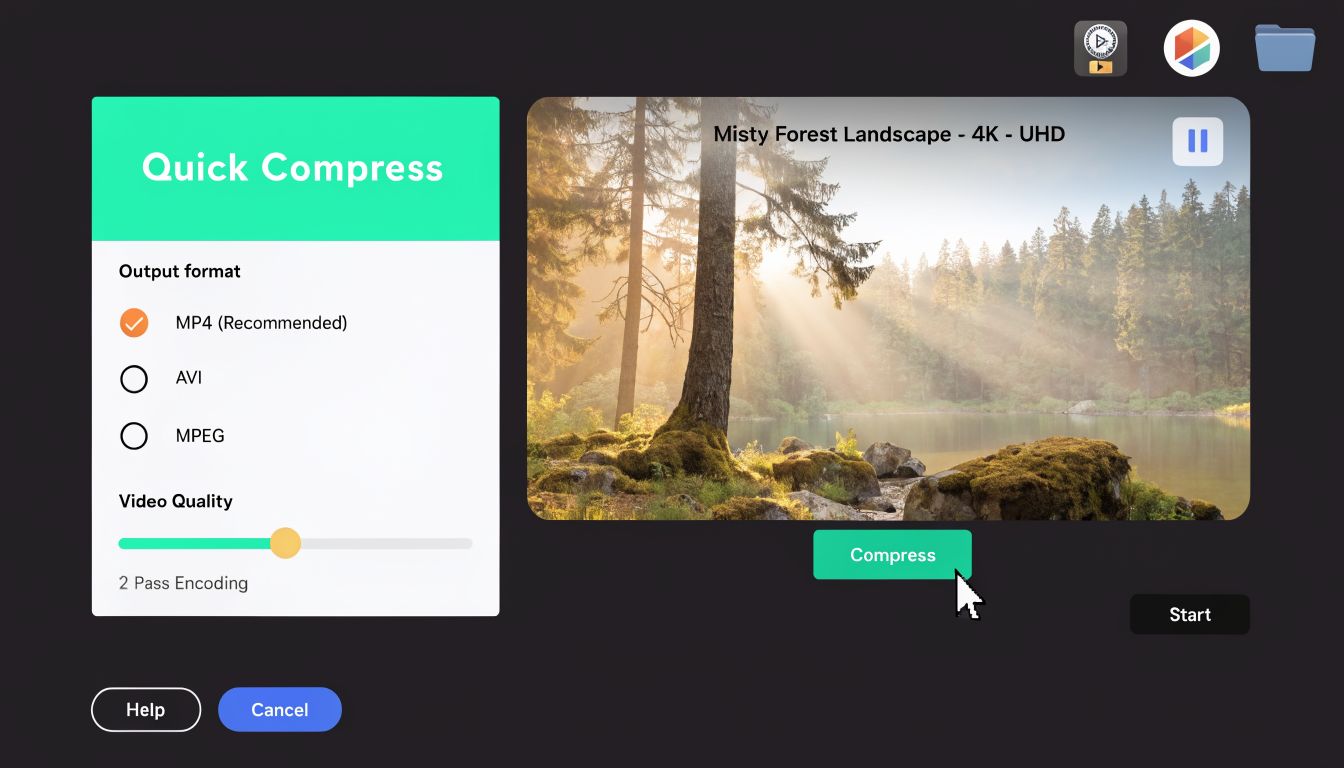
HandBrake is where most creators should start. It's free, reliable, and gives you enough control to get smaller files without dumping you into advanced encoding decisions on day one.
### Why HandBrake is the easiest place to start
The big win with HandBrake is the preset system. You don't have to build an encode from scratch. The introduction of **H.264 (AVC)** changed MP4 compression by delivering **up to 50% better efficiency than MPEG-2** while keeping similar quality, and HandBrake's common presets lean on that standard workflow for practical web delivery, as noted in the [video compression guide from Video4Change](https://video4change.org/book/video-compression-guide/).
For beginners, that matters because H.264 still plays nicely almost everywhere. If your priority is “make this smaller and keep it looking good,” compatibility is part of quality.
### A simple HandBrake workflow that works
Open HandBrake and follow this sequence:
1. **Load your file**
Drag your MP4 into HandBrake or choose it from the source menu.
2. **Choose a preset**
Use **Fast 1080p30** if your output is standard Full HD. It's a solid default for web and social delivery.
3. **Keep MP4 as the container**
Unless you have a specific reason to switch, stay with MP4.
4. **Check the video codec**
Leave it on H.264 for broad compatibility.
5. **Watch the dimensions tab**
If your source is already the right size, don't resize it just because you can. Unnecessary scaling often creates softness.
6. **Review frame rate**
If the source is 30 fps, keep it there unless you're intentionally optimizing for short-form and know a lower frame rate is acceptable for the cut.
7. **Start the encode**
Pick a destination file name and hit Start.
That's enough for a lot of creators. If you want a faster browser-based option for simpler jobs, this [video compressor tool](https://www.blitzreels.com/tools/video-compressor) can be useful when you don't want to install or tune anything.
> **Practical rule:** Start with a preset, test the output on your phone, and only then tweak settings. Most people overcomplicate compression before they've seen what the default can already do.
A quick visual walkthrough helps if you're more comfortable copying the motions first:
### When VLC is good enough
VLC isn't my first choice for serious batch work, but it's installed on a lot of machines and it can save you in a pinch.
Use it when:
- **You need a quick one-off conversion**
- **You're on someone else's computer**
- **You don't need deep tuning**
Basic VLC path:
- **Open Convert/Save:** Add your file from the Media menu.
- **Pick a profile:** Choose an MP4 profile that uses H.264.
- **Set destination:** Name the output clearly so you don't overwrite the original.
- **Convert and inspect:** Always watch the result, especially text and motion.
### What works and what doesn't
A few beginner mistakes show up constantly:
| Situation | Better move | Worse move |
|---|---|---|
| File is too large | Lower bitrate through a proven preset | Re-export randomly from the editor with guessed settings |
| Video looks soft after compressing | Keep resolution and test bitrate first | Drop resolution immediately |
| Need universal playback | Use H.264 MP4 | Use a newer codec without checking compatibility |
HandBrake handles most everyday compression jobs well because it removes the guesswork. VLC helps when convenience matters more than precision.
## Balancing Video Quality and File Size
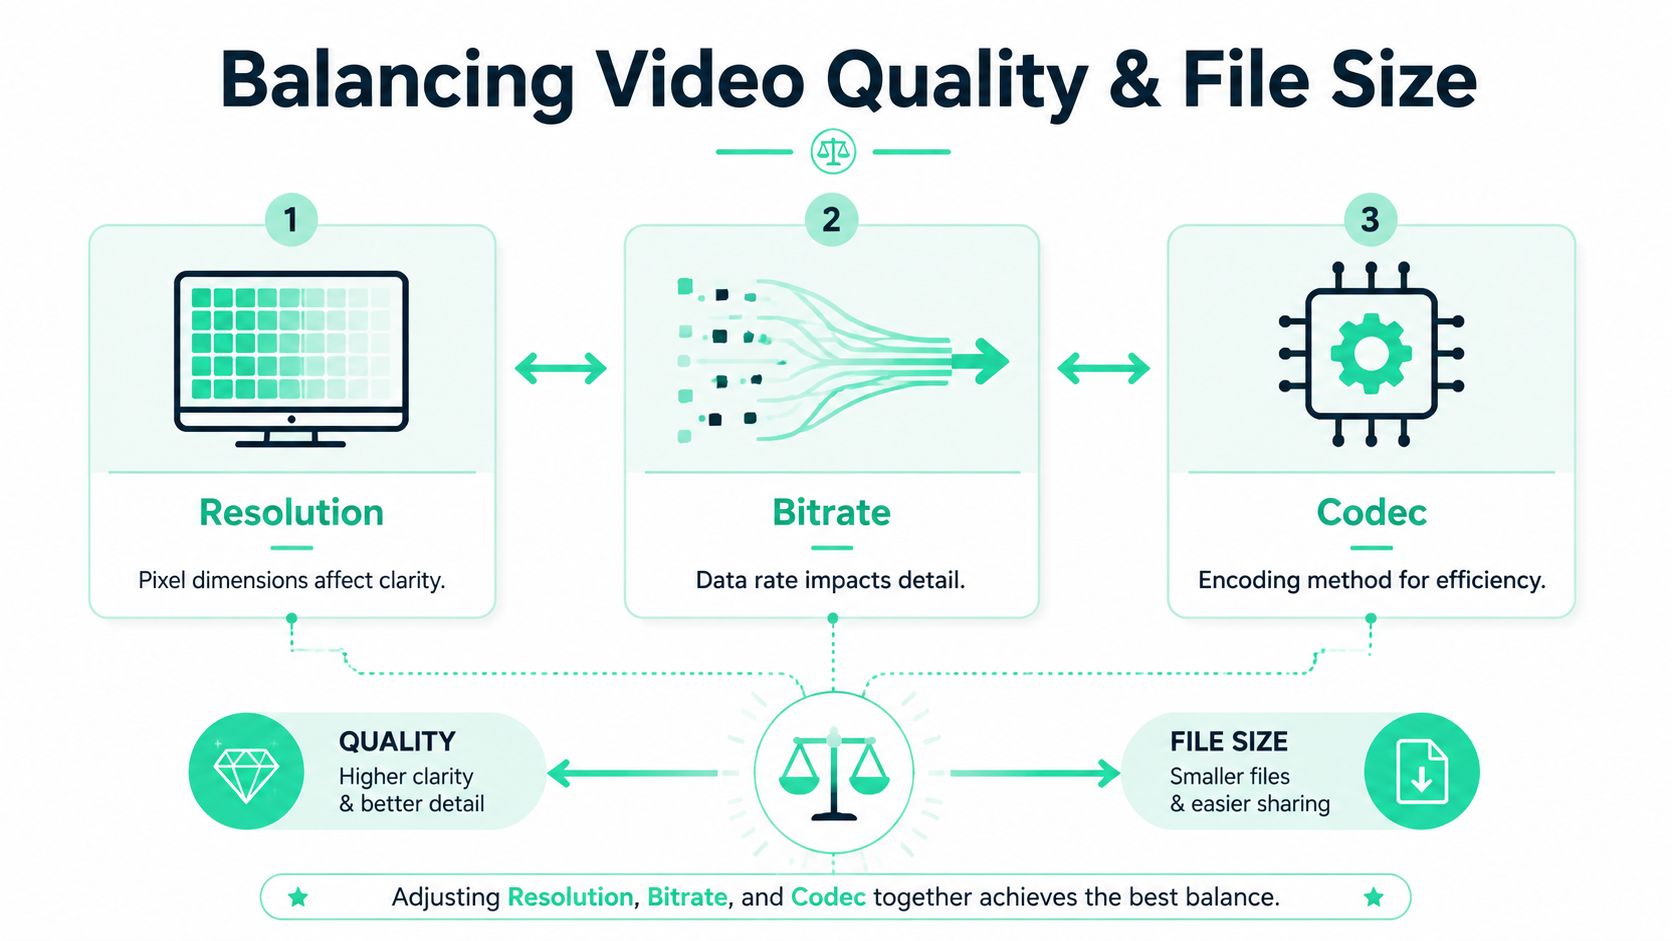
Once the preset delivers a decent result, the primary concern is usually which lever to pull first. Avoid adjusting every setting simultaneously. Compression becomes predictable when you understand the three controls that move the outcome: **resolution, bitrate, and codec**.
### Resolution is your pixel count
Resolution is the frame size. More pixels usually mean more detail, but also more data to encode. If your audience watches mostly on phones, a giant file can be wasteful if the extra detail doesn't survive upload and playback anyway.
Still, dropping resolution too early is a mistake. If your text overlays are small, your framing is tight, or your video has fine visual detail, keep the frame size and test bitrate changes first.
### Bitrate is your quality budget
Bitrate is where most of the primary compression decision-making happens. Think of it as the amount of data you allow the encoder to spend each second. More budget usually means cleaner detail and motion. Less budget means smaller files, but also more risk of smearing, blocking, and ugly gradients.
The simplest approach:
- **Talking head with clean background:** compresses well
- **Fast cuts, camera movement, textured backgrounds:** needs more data
- **Captions and motion graphics:** expose compression flaws quickly
> If captions look ragged or faces break apart during motion, the bitrate is often too low before the resolution is too high.
### H264 versus H265
This is the most important codec decision for most creators. **H.265 (HEVC)**, finalized in 2013, can deliver **25% to 50% smaller file sizes than H.264 at equivalent quality**, and a **2 GB 1080p MP4 can compress to under 1 GB** in tools like HandBrake, according to [StreamYard's HEVC compression guide](https://streamyard.com/blog/how-to-compress-a-video).
That makes H.265 attractive for creators working with:
- **High-quality short-form exports**
- **4K source footage**
- **Large review files**
- **Storage-sensitive workflows**
But there's a trade-off. H.265 is more efficient, yet it can be slower to encode and less convenient on older devices or older software. So the choice isn't “better codec wins.” It's “better codec for this delivery path.”
### A quick decision table
| Priority | Best default choice |
|---|---|
| Broad compatibility | **H.264** |
| Smaller file at similar quality | **H.265** |
| Fastest beginner workflow | **HandBrake preset with H.264** |
| Better efficiency for premium exports | **H.265 with testing** |
### The order I'd adjust settings
If you're trying to make a file smaller without wrecking it, change things in this order:
1. **Codec first, if compatibility allows**
2. **Bitrate second**
3. **Frame rate only if the content allows it**
4. **Resolution last**
That order protects perceived quality better than slashing the frame size first. Creators often assume more pixels always matter most. In practice, a cleaner 1080p file usually beats a poorly compressed “higher-res” upload.
## Precision Control with FFmpeg Command Line
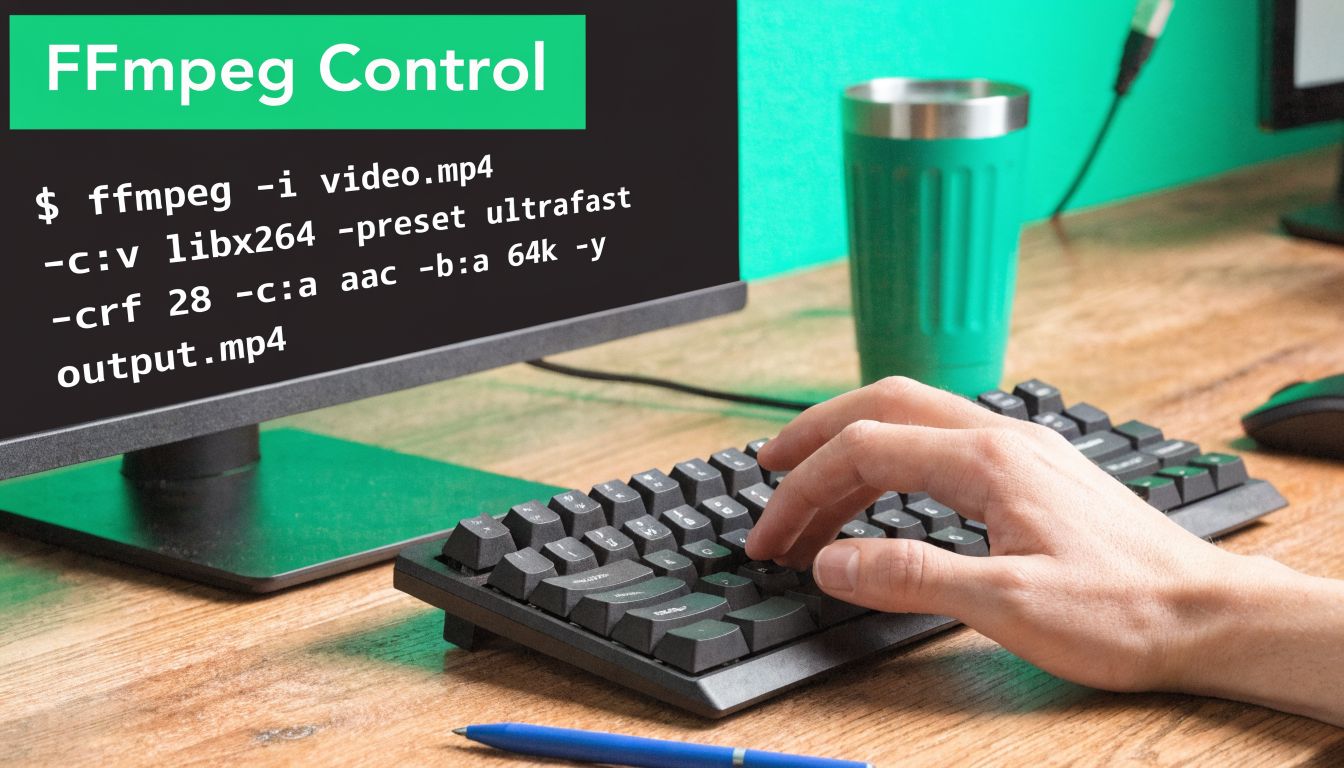
FFmpeg looks intimidating until you realize it's just a repeatable way to do what GUI apps are already doing behind the scenes. If you compress a lot of videos, need batch consistency, or want exact control, the workflow gets serious at this point.
### A clean starting command
For a straightforward H.265 encode, use:
```bash
ffmpeg -i input.mp4 -c:v libx265 -crf 23 output.mp4
```
What each part does:
- **-i input.mp4** tells FFmpeg which file to read
- **-c:v libx265** sets the video codec to H.265
- **-crf 23** uses quality-based compression
- **output.mp4** names the finished file
CRF is useful because you're telling FFmpeg to target a quality level instead of forcing a rigid bitrate. That's practical when one clip is mostly static and another is full of cuts and motion.
### Resize while you compress
If you shot in 4K and are delivering in 1080p, combine scaling with compression in one step:
```bash
ffmpeg -i input.mp4 -c:v libx265 -crf 23 -vf scale=1080:1920 output.mp4
```
Use scaling carefully. It's a valid move when you're adapting horizontal or oversized footage for vertical social, but it shouldn't be your first reflex for every file.
A better habit is this checklist:
- **Check the source first:** Know the frame size and frame rate before changing anything.
- **Scale with purpose:** Resize because the destination needs it, not because smaller numbers feel safer.
- **Watch text after export:** Captions and UI elements reveal scaling issues fast.
### Two-pass when the file size really matters
Sometimes you don't just want “smaller.” You need a more exact target because the platform, client handoff, or upload window forces the issue. That's where two-pass encoding helps.
For short-form content, two-pass VBR in FFmpeg is a strong option because the first pass analyzes the video and the second allocates bitrate more intelligently. Benchmarks cited by [Compresto's MP4 compression article](https://compresto.app/blog/file-compression-mp-4) report **up to a 45% size reduction compared to a single-pass H.264 encode while keeping PSNR above 40dB**.
Use the two-pass pattern like this:
```bash
ffmpeg -i input.mp4 -c:v libx265 -b:v 4000k -pass 1 -f null /dev/null
ffmpeg -i input.mp4 -c:v libx265 -b:v 4000k -pass 2 output.mp4
```
What matters here:
- **Pass 1** studies the clip
- **Pass 2** spends bits where the image needs them most
- **-b:v 4000k** sets the target video bitrate
> Two-pass is worth the extra time when the file must land in a tight delivery window and still survive another round of platform recompression.
### When FFmpeg is the right tool
FFmpeg shines when you need to:
- **Batch process many clips**
- **Apply identical settings every time**
- **Build automation into a content pipeline**
- **Avoid clicking through export panels repeatedly**
What doesn't work is copying random commands without knowing why they exist. Keep a small set of tested commands for your actual use cases. One for archive-quality review, one for vertical social, and one for tight file-size limits. That's enough for most creators.
## Compressing for TikTok Reels and YouTube Shorts
Social compression is different from archive compression. Your file doesn't just need to look good on export. It needs to survive the platform's own processing after upload. That changes what “good compression” means.
### What social platforms care about
For TikTok, Reels, and Shorts, the priorities are usually the same: vertical framing, readable text, clean faces, and a file that uploads and processes quickly. Huge files aren't a badge of quality here. They often just give the platform more material to recompress badly.
One useful short-form nuance is file restraint. A creator-focused walkthrough on YouTube notes that uploads over **50MB** may get lower initial Instagram boost in creator testing, and that dropping from **30 fps to 24 fps can save 20% in file size** for fast-cut shorts with little visible loss, according to the [video discussion on platform-specific compression behavior](https://www.youtube.com/watch?v=CXNKx6_PsT8).
That doesn't mean every short should be 24 fps. It means frame rate is one of the few settings you can lower strategically when the edit style allows it.
### A practical export recipe for vertical shorts
If I'm preparing a standard short-form video, I'd aim for settings like these:
| Setting | Practical target |
|---|---|
| Aspect ratio | **9:16** |
| Resolution | **1080 x 1920** |
| Codec | **H.264 for compatibility, H.265 if your workflow supports it** |
| Frame rate | **Match source, or test 24 fps for fast-cut edits** |
| Bitrate approach | **Moderate, not excessive** |
For creators comparing tools before they even get to compression, this roundup of [top TikTok video editing apps](https://viral.new/blog/best-video-editing-apps-for-tiktok) is worth reviewing because export behavior varies more than people expect.
In HandBrake, that usually means:
- **Set dimensions to 1080 x 1920**
- **Choose MP4**
- **Start with H.264 if you need broad playback**
- **Review the output on your phone before publishing**
In FFmpeg, a vertical encode might look like:
```bash
ffmpeg -i input.mp4 -c:v libx265 -b:v 4000k -r 24 -vf scale=1080:1920 output.mp4
```
That example is not a universal rule. It's a starting point for fast-cut social content where size matters and 24 fps won't hurt the feel of the edit.
If your focus is Shorts delivery specifically, a dedicated [YouTube Shorts video compressor](https://www.blitzreels.com/tools/compress-video-for-youtube-shorts) can help simplify the sizing step.
### What usually goes wrong
Most failed social uploads come from one of these decisions:
- **Oversized exports:** The platform recompresses aggressively and wrecks fine detail.
- **Wrong aspect ratio:** The app crops unpredictably and harms framing.
- **Bitrate pushed too low:** Captions, faces, and motion break apart.
- **Repeated re-exports:** Every extra generation can make artifacts worse.
> A good social export is pre-optimized, not maxed out. You want the cleanest file that still gives the platform less work to do.
The creators who get crisp-looking shorts consistently aren't always using the fanciest settings. They're using repeatable ones.
## The Fastest Method AI-Powered Compression
A common creator bottleneck shows up after the edit is already done. The clip is strong, the captions read well, the framing works, and then export turns into a repetitive quality-control job across ten or twenty videos.
Manual compression still matters because it teaches judgment. You learn why one clip survives a lower bitrate and another falls apart, why captions can soften before faces do, and why a file that looks fine on desktop can look rough after TikTok or Reels recompresses it. That knowledge makes automation more useful, not less.
### Why manual compression stops scaling
The problem is consistency.
A solo creator or social team can dial in one export by hand. Doing that repeatedly without mistakes is harder. One clip goes out at the wrong frame rate. Another keeps a bitrate that is far higher than the platform needs. A third gets re-exported after captions are burned in, and the text loses edge detail. Social platforms will compress those files again anyway, so every unnecessary misstep gives the algorithm a weaker starting file.
That matters for performance, not just storage. On Shorts, Reels, and TikTok, clean motion, readable captions, and fast playback affect whether the video feels polished in the first second. If the file stutters on upload, shows mushy text, or breaks apart in motion, viewers notice before they ever reach the hook.
Typical compression guides stop at file size. Working creators need a repeatable publishing workflow.
### What AI compression actually improves
Good AI-assisted compression cuts repeated decisions while keeping the settings aligned with short-form delivery:
- **It applies consistent export logic across batches** so your clips look like they came from one system, not five different presets.
- **It protects social-first details** such as subtitle readability, face clarity, and vertical framing.
- **It reduces avoidable re-exports** that soften footage before the platform gets it.
- **It speeds up turnaround** for creators publishing daily clips from podcasts, webinars, interviews, or long-form episodes.
I still recommend learning the manual path first. Then hand off the repetitive part.
If you want a separate reference on [compressing videos for YouTube](https://lesfm.net/blog/video-compression-youtube/), that guide pairs well with this one.
Automation earns its place when volume goes up. Instead of babysitting HandBrake queues or writing another FFmpeg command, you can spend that time improving hooks, trimming dead space, fixing pacing, and testing what holds attention on mobile.
If you want a faster way to turn long videos into upload-ready shorts, [BlitzReels](https://blitzreels.com) can handle the heavy lifting. Upload your footage, generate clipped vertical videos with captions and reframing, and export files that are already sized for short-form publishing without spending your day inside HandBrake or FFmpeg.
*Created with [Outrank app](https://outrank.so)*