---
title: "How to Use iMovie for TikTok & Reels in 2026"
canonical: "https://blitzreels.com/blog/how-to-use-imovie"
---
# How to Use iMovie for TikTok & Reels in 2026
URL: https://blitzreels.com/blog/how-to-use-imovie
Markdown URL: https://blitzreels.com/blog/how-to-use-imovie.md
Published: 2026-06-28
Author: BlitzReels
Learn how to use iMovie to create engaging TikTok & Reels videos. This 2026 step-by-step guide covers vertical setup, editing, captions, and export tips.
Tags: how to use imovie, imovie for tiktok, vertical video editing, imovie tutorial, short form video

A lot of people open iMovie for the same reason. They need a TikTok, Reel, or Short today, they don't want another subscription, and they don't have time to learn a heavyweight editor just to trim clips, add a hook, and post.
That's where iMovie still makes sense. It's a completely free editor included with every Mac, iPhone, and iPad, and Apple gives users access to its full toolset without extra purchases or subscription fees, including multi-track editing, 4K support, and color controls, according to [Apple-focused market coverage summarized by Statista](https://www.statista.com/topics/1356/apple-mac/#topicOverview). For someone learning **how to use iMovie** for quick social clips, that lowers the barrier immediately.
The catch is that iMovie wasn't built around modern short-form workflows. It can cut clips fast, add title cards, handle basic audio, and export clean files. But once captions, reframing, resizing, hooks, and repeatable templates become part of the weekly posting routine, the friction starts to show. A practical primer like this guide on [how to use iMovie](https://www.mykaraoke.video/blog/how-to-use-imovie) helps with the basics, but social-first editing needs a few extra hacks that most beginner tutorials skip.
## Table of Contents
- [Your First Step into Video Editing with iMovie](#your-first-step-into-video-editing-with-imovie)
- [Why iMovie still works for beginners](#why-imovie-still-works-for-beginners)
- [What iMovie does not solve well](#what-imovie-does-not-solve-well)
- [Setting Up Your Project for Vertical Video](#setting-up-your-project-for-vertical-video)
- [Use App Preview instead of Movie](#use-app-preview-instead-of-movie)
- [Import media the right way](#import-media-the-right-way)
- [A Fast Editing Workflow for Your Timeline](#a-fast-editing-workflow-for-your-timeline)
- [Build the rough cut first](#build-the-rough-cut-first)
- [Use transitions sparingly](#use-transitions-sparingly)
- [What works best for hooks and clipping](#what-works-best-for-hooks-and-clipping)
- [Adding Titles Captions and Audio](#adding-titles-captions-and-audio)
- [Titles that stop the scroll](#titles-that-stop-the-scroll)
- [The manual caption problem](#the-manual-caption-problem)
- [Audio choices that help instead of distract](#audio-choices-that-help-instead-of-distract)
- [Cropping Reframing and Exporting for Social](#cropping-reframing-and-exporting-for-social)
- [How to reframe horizontal footage](#how-to-reframe-horizontal-footage)
- [Export settings that make sense](#export-settings-that-make-sense)
- [When to Graduate from iMovie The Path to Faster Creation](#when-to-graduate-from-imovie-the-path-to-faster-creation)
## Your First Step into Video Editing with iMovie
The strongest reason to start with iMovie is simple. It removes the usual decision between expensive professional software and lightweight mobile apps that can't do enough.
For short-form creators, that matters. A founder recording product updates, a marketer cutting webinar clips, or a creator posting daily talking-head videos usually doesn't need a cinematic editing suite. They need a clean timeline, quick clipping, usable title cards, decent audio control, and exports that won't fall apart on mobile.
### Why iMovie still works for beginners
iMovie handles the core editing jobs well. It supports common video formats such as MP4, MOV, and M4V, along with audio files like AAC and MP3, so footage from an iPhone, a camera, or a screen recording usually drops in without conversion. It also integrates with the Photos Library, which keeps the start of the workflow smooth when clips already live on an Apple device.
> **Practical rule:** If the job is trimming, rearranging, adding a simple hook, layering music, and exporting fast, iMovie is often enough.
That's especially true for someone learning editing vocabulary for the first time. The timeline is approachable, the controls are visible, and the export flow is straightforward enough that a short-form edit can move from raw clips to a finished file quickly.
### What iMovie does not solve well
The trade-off shows up when social video gets more demanding. TikTok, Instagram Reels, YouTube Shorts, and LinkedIn video all reward fast hooks, bold captions, face-centered framing, and flexible resizing. iMovie can produce those results, but it often does so through manual workarounds rather than dedicated tools.
That means it's a good classroom. It's not always a good production line.
A new creator should treat iMovie as a place to learn the foundations. A busy content team should treat it more carefully, because the time spent manually typing captions, reframing clips, and faking vertical layouts can pile up fast.
## Setting Up Your Project for Vertical Video
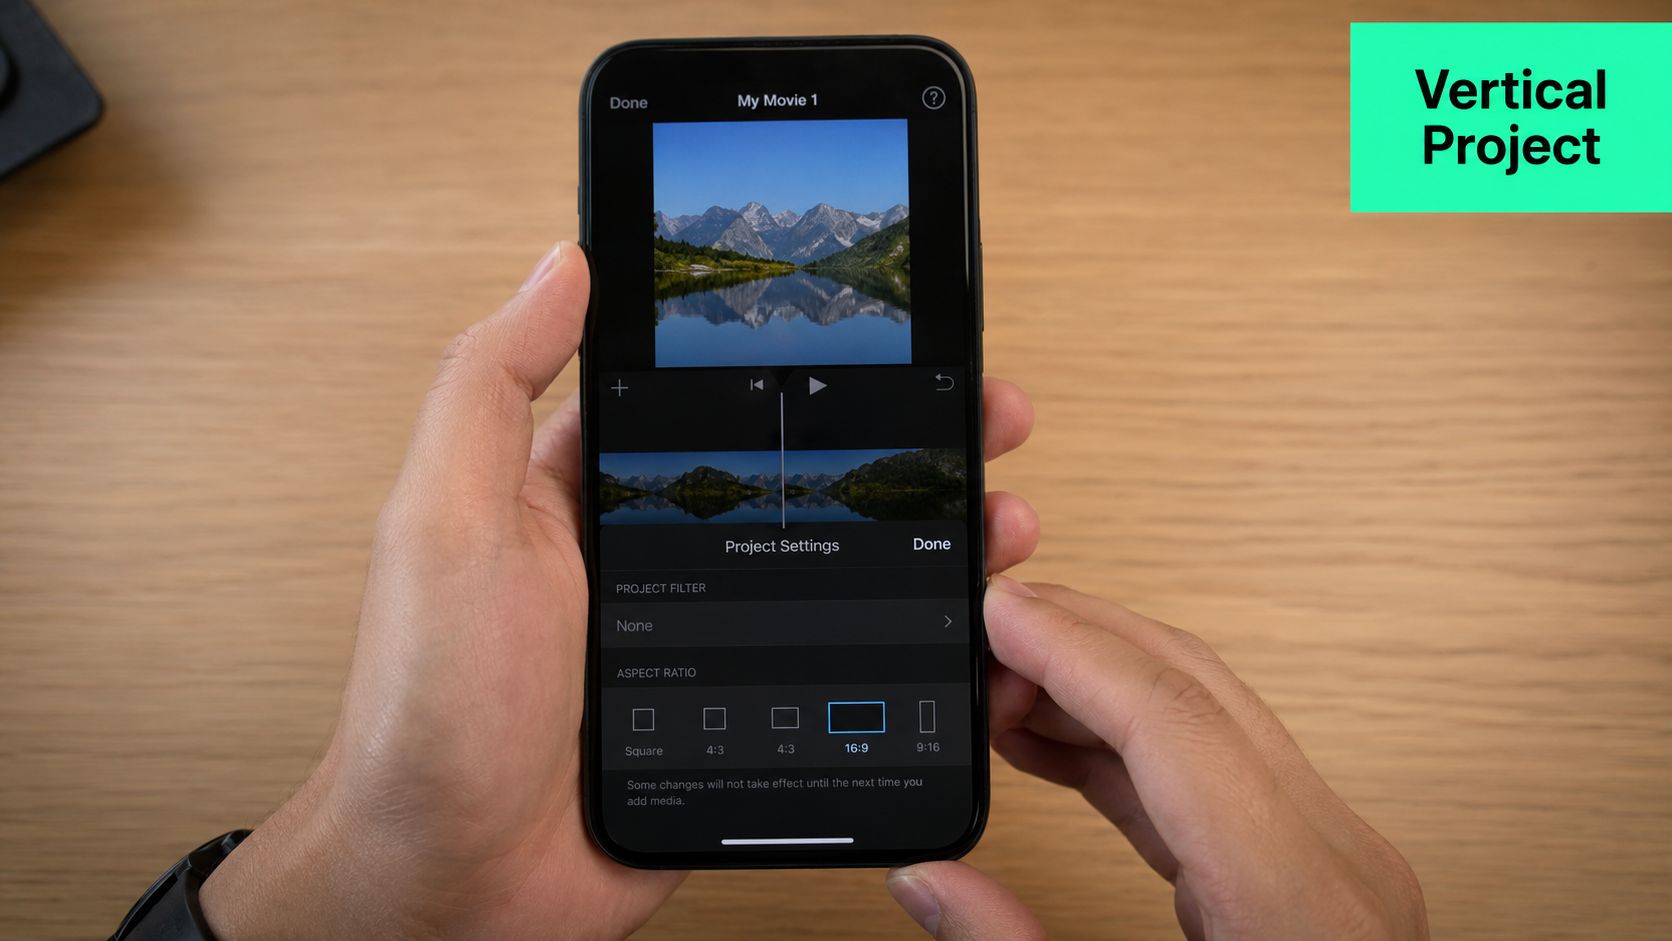
The biggest iMovie mistake happens before the first cut. Users often create a standard Movie project, then spend the rest of the edit fighting black bars, awkward crops, and mismatched framing.
### Use App Preview instead of Movie
For vertical short-form video, the better move is to start with **New App Preview** from the File menu. According to [this iMovie vertical video tutorial](https://www.youtube.com/watch?v=8FT0B8o7YM8), that project type sets the canvas to a **9:16 vertical format** for TikTok, Instagram Reels, and YouTube Shorts without the black bars that usually appear when people begin with the default project.
That one choice changes the entire editing experience. Instead of forcing horizontal footage into a vertical destination at the end, the edit starts in the shape the platform expects.
A simple setup sequence works best:
1. **Open iMovie and go to File**. Look for **New App Preview**, not Create New.
2. **Name the project clearly**. A social naming convention helps, especially when one video becomes several variants.
3. **Drop in the strongest clip first**. Short-form editing gets easier when the opening hook sits at the top of the timeline from the start.
4. **Check framing immediately**. If a face looks cramped in the first seconds, the whole cut will feel harder later.
For creators comparing editors built for this shape from the start, this guide to a [vertical video editor](https://www.blitzreels.com/blog/vertical-video-editor) is useful context because it shows what a native vertical workflow looks like without iMovie's setup hack.
### Import media the right way
Once the project is vertical, importing footage is easy. iMovie supports standard camera and phone formats, and it can also bring in screen recordings. That matters for product demos, tutorial clips, and creator commentary where B-roll often comes from a browser recording rather than a camera.
The cleanest workflow usually looks like this:
| Asset type | Best use in a short | What to watch for |
|---|---|---|
| Phone camera clip | Talking head, selfie video, product demo | Keep the subject centered early |
| Screen recording | Tutorials, app walkthroughs, explainers | Small interface text can become hard to read |
| Photo or graphic | Title card, cover frame, callout | Don't leave it on screen too long |
| Music or voice clip | Background energy, narration | Keep spoken audio clear over music |
After the media is inside the project, a quick pass through the clip order saves time. Put hook footage first, then proof, then payoff. That structure usually works better for social than editing chronologically.
A visual walkthrough helps if the App Preview option feels hidden:
## A Fast Editing Workflow for Your Timeline
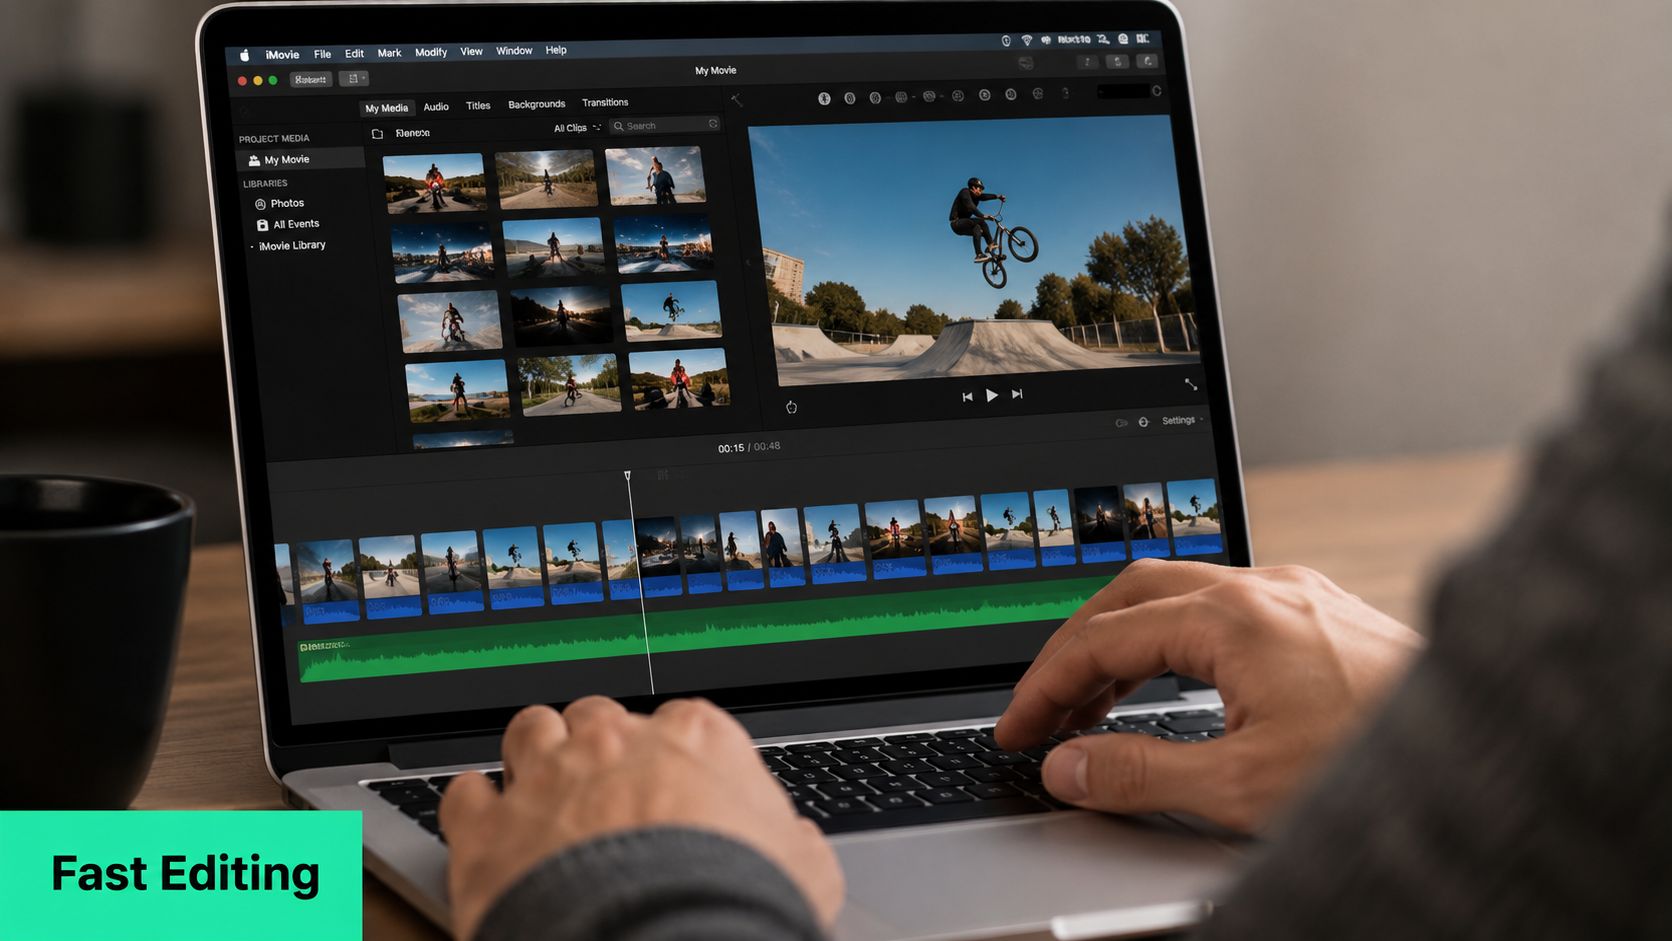
Short-form editing falls apart when every trim becomes a tiny, fiddly timeline operation. iMovie is at its best when the editor treats it like a fast assembly tool, not a place for endless polishing.
### Build the rough cut first
The fastest social workflow starts with a rough cut that ignores perfection. Drop in every usable clip, trim dead air, remove repeated phrases, and get the story order right before touching visual polish.
That usually means focusing on three questions:
- **Does the first second create curiosity?** A hook can be a direct claim, a surprising visual, or a sharp title card.
- **Does every clip earn its place?** If a sentence doesn't add proof, tension, or payoff, it usually slows the short down.
- **Would a viewer understand this on mute?** If not, title text or captions will have to work harder later.
A clean method is to scrub quickly through footage, set ranges, and send only the good parts to the timeline. According to [this beginner editing guide](https://www.youtube.com/watch?v=R3ChD0E8M7c&t=1s), the **I**, **O**, and **E** shortcuts can reduce editing time by **up to 40%**, because they let users mark in and out points and add clips precisely without dragging everything by hand.
> Editing gets faster when the timeline only receives selected moments, not whole clips.
That's the difference between “editing” and “sorting on the timeline.” The second one always takes longer.
For a broader look at pacing, clipping, and mobile-first cuts, this article on [short-form video editing](https://www.blitzreels.com/blog/short-form-video-editing) is a useful companion read.
### Use transitions sparingly
iMovie includes **20+ transition effects**, including options like Cross Dissolve and Slide, and it offers **over 15 pre-rendered title animations** that can be dragged directly onto the timeline. Those tools are fine, but most social shorts don't improve with lots of motion between clips.
A practical split looks like this:
- **Jump cuts** work best for talking-head clips, commentary, and educational content.
- **Cross Dissolve** can help when switching B-roll scenes or moving into a calmer moment.
- **Slides and flashy transitions** usually feel dated in short-form unless the style is intentionally playful.
### What works best for hooks and clipping
The strongest iMovie edits usually open with one of these patterns:
- **Direct promise:** A line that tells viewers what they'll get if they stay.
- **Problem first:** A pain point in the opening seconds, then the answer.
- **Visual interruption:** A crop change, gesture, or title card that breaks the scroll pattern.
iMovie's timeline is good enough for this style because the tool doesn't distract with too many layers. The limit is speed under repetition. One or two clips are easy. A week of daily posting is where the manual rhythm starts to drag.
## Adding Titles Captions and Audio
Good social clips usually win or lose here. The cut can be clean, but if the text is hard to read or the audio feels messy, the post starts looking unfinished on mobile.
### Titles that stop the scroll
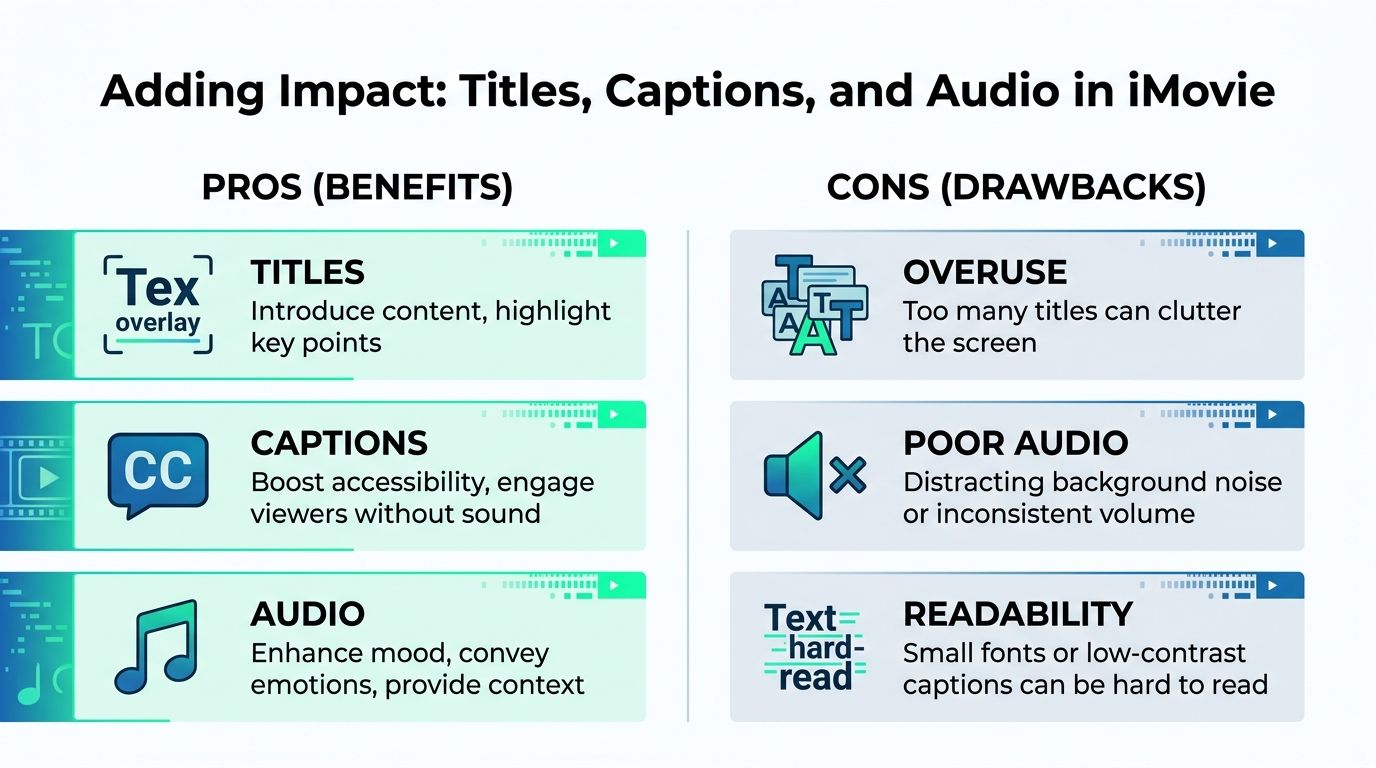
iMovie handles titles better than many free editors. For quick social work, the built-in templates are enough to create a hook, label a speaker, or break a clip into clear sections. The limitation is style control. You can get clean text on screen, but not the kind of flexible motion text many Reels and TikTok editors now expect.
Keep titles doing one job at a time. A short hook at the start, one or two emphasis cards in the middle, and a simple CTA at the end usually works better than filling the frame with text.
A few habits make iMovie titles hold up on vertical video:
- **Write for silent viewing:** The first title should make sense even if the viewer never turns sound on.
- **Use bigger text than feels necessary:** Phone screens punish small type.
- **Keep it high or low on the frame:** Leave room for platform UI and captions.
- **Match title length to clip speed:** Fast pacing needs fewer words, not smarter words.
### The manual caption problem
Captions matter more than decoration. They help silent viewers follow the point, and they keep attention anchored during fast cuts. If you want the performance case for that, this breakdown of [how captions drive engagement on TikTok and Instagram](https://www.blitzreels.com/blog/how-captions-drive-engagement-on-tiktok-and-instagram) is worth reading.
iMovie does not make captions fast. There is no native auto-caption tool, no speaker-aware timing, and no simple way to restyle a full set of subtitles across multiple clips. You are usually stacking title overlays, adjusting each line by hand, and checking timing line by line.
That process works for a one-off post.
It slows down hard when you are publishing several clips a week, especially if you want animated words, highlighted keywords, or consistent brand styling. According to [this iMovie social editing class](https://www.skillshare.com/en/classes/editing-with-imovie-for-social-media/457888593), creators run into the same gaps repeatedly: no AI captions, no dynamic reframing, and no built-in short-form motion tools.
One workaround is to create caption graphics outside iMovie and import them as overlays. According to [this Reels and TikTok iMovie guide](https://www.mediaalacarte.com/post/how-to-edit-reels-and-tiktoks-in-imovie), PNG caption files can be rotated in Preview if needed, brought into iMovie, set to **Fit**, and paired with **Dissolve** at **0** so they stay stable across exports. That method gives you more visual control, but it is still a manual pipeline.
For occasional edits, that trade-off is acceptable. For daily social production, it is usually the point where creators start looking at a purpose-built tool like BlitzReels, because auto-captions and editable caption styles save real time.
### Audio choices that help instead of distract
Audio is one area where iMovie still does a solid job for free software. You can lower music under dialogue, add simple sound effects, and clean up the mix enough for short-form publishing. For talking-head clips, that is often all you need.
The priority is clear speech. Background music should support pacing, not compete with the voice, and sound effects should mark moments instead of filling every gap.
Use a simple approach:
- **Set dialogue first:** Get the voice clear before adding anything else.
- **Duck music under speech:** Keep it present, but safely behind the message.
- **Add effects only where they reinforce a beat:** A whoosh on every cut gets old fast.
- **Check with phone speakers:** If the voice gets muddy there, the mix is too heavy.
I usually tell new marketers to judge audio by one standard. If the message feels easier to follow, keep it. If the viewer starts noticing the edit more than the point, pull it back.
## Cropping Reframing and Exporting for Social
A short can be well edited and still fail on mobile because the framing is wrong. This is the part where iMovie often asks for more manual effort than new users expect.
### How to reframe horizontal footage
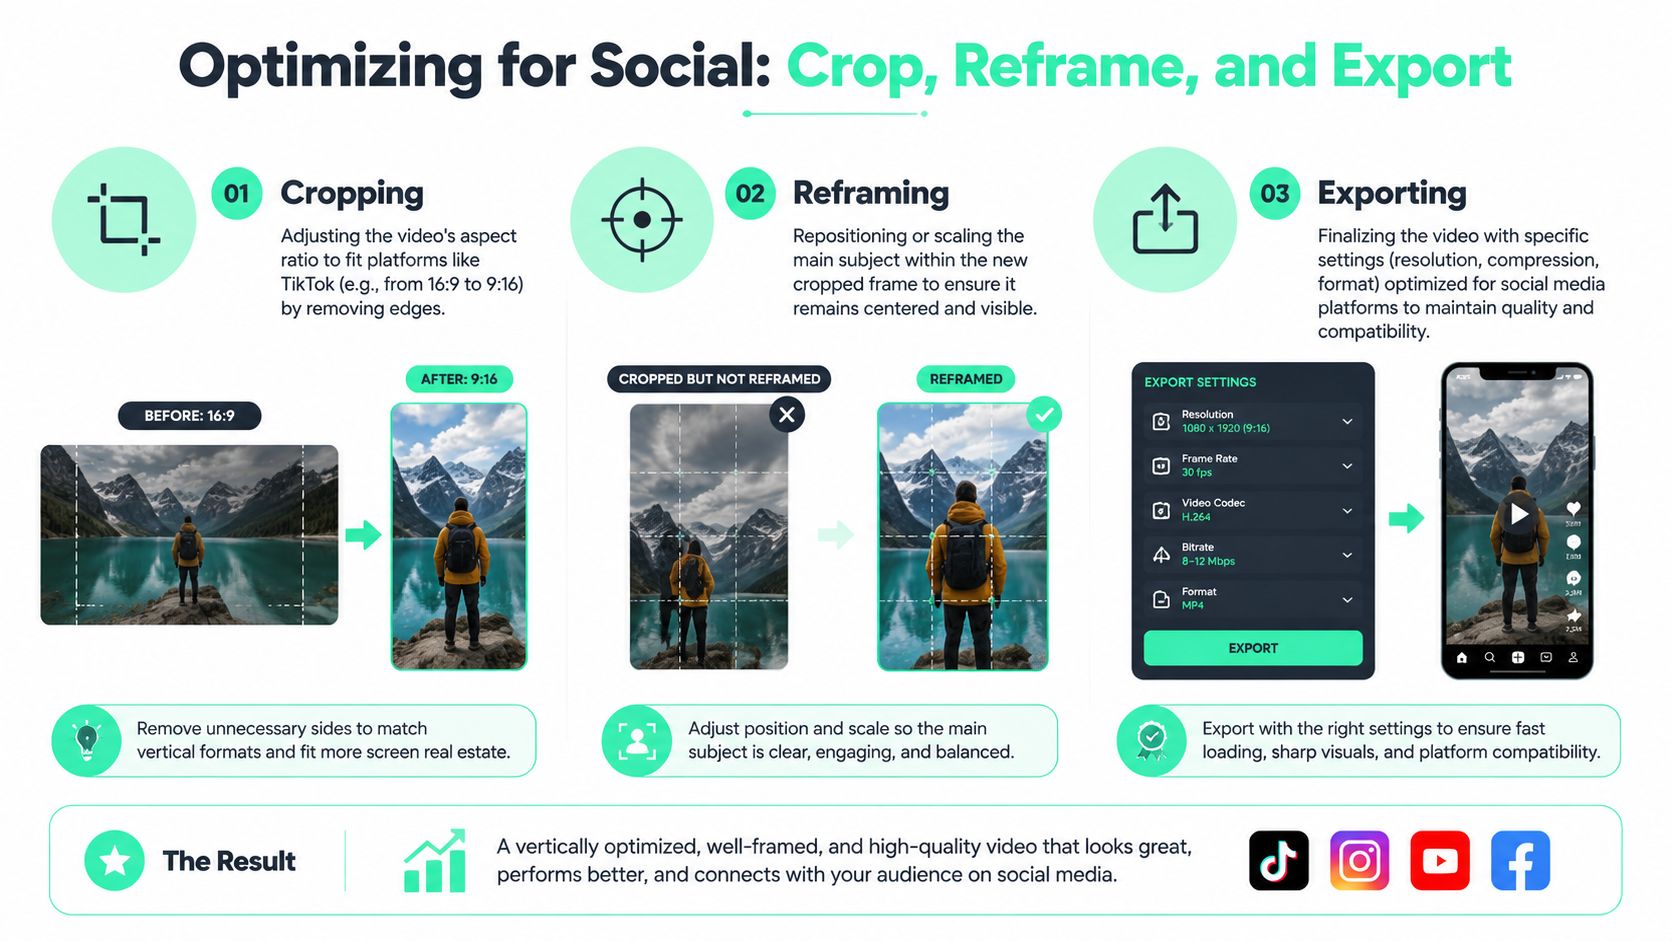
The standard aspect ratio for TikTok, Instagram Reels, and YouTube Shorts is **9:16**, and [Moment's short-form production guide](https://www.shopmoment.com/articles/how-to-shoot-and-edit-short-form-video-for-instagram-reels-tiktok) warns against careless resizing because essential visual elements can get cut out. That's exactly the challenge with older horizontal footage inside iMovie.
When the original video is 16:9, the editor usually has to crop and reposition manually. The process works, but it's limited:
- **Crop to Fill** can force a tighter frame, but it may chop off hands, products, or face edges.
- **Ken Burns** can fake movement or repositioning, but it isn't face-aware.
- **Multiple cuts** often become necessary if the speaker moves across the frame.
That last part is the problem. A frequently overlooked issue with iMovie is that custom vertical reframing is widely asked about but poorly explained, and [this digital video analysis](https://integralads.com/insider/tackling-challenges-in-social-media-and-digital-video/) notes that most tutorials still center on **1920x1080** export, leaving creators to rely on awkward hacks to reframe vertical content without cropping faces.
> A static crop works on static footage. Once the subject moves, manual reframing turns into repeated correction.
### Export settings that make sense
Export should be simple. For short social clips, it usually is.
According to [this vertical iMovie tutorial](https://www.youtube.com/watch?v=1CbtUDps6bc), short-form videos for platforms like TikTok and Reels should generally stay **under 60 seconds**, and users are advised to export at **1080p** through the file export option for clean vertical output on mobile. iMovie also supports direct exports and file-based output with options like 720p, 1080p, and 4K, plus selectable quality levels.
A practical export checklist looks like this:
| Decision | Best default in iMovie | Reason |
|---|---|---|
| Length | Under 60 seconds | Better fit for common short-form posting habits |
| Resolution | 1080p | Strong quality without unnecessary excess |
| Export path | File export | More control before uploading to a platform |
| Final check | Watch on phone | Small framing mistakes show up fast on mobile |
For creators who frequently resize clips across platforms, this guide on [how to change aspect ratio](https://www.blitzreels.com/blog/how-to-change-aspect-ratio) is worth reviewing because it highlights how much manual work different aspect ratios can create.
## When to Graduate from iMovie The Path to Faster Creation
A lot of marketers hit the same point with iMovie. The first few vertical clips feel fast enough, then the weekly workload shows where the app starts costing time.
iMovie still deserves respect. For free software that ships with Apple devices, it teaches the right habits. You learn how to trim with intent, tighten pacing, clean up rough audio, and place text without cluttering the frame. For one-off updates, founder videos, product teasers, or simple talking-head clips, that is often enough.
It also gives new editors a safe place to learn timeline discipline before they spend money on a more specialized stack.
Where it slows down is repeat production for social.
Short-form teams rarely publish just one clean cut. They need multiple clips from one source video, readable on-screen captions, vertical framing that keeps faces centered, and a consistent visual style across Reels, Shorts, TikTok, and LinkedIn. iMovie can handle pieces of that process, but it asks for manual work at nearly every step. That trade-off is fine when you post occasionally. It gets expensive when content is part of your pipeline.
The pressure points usually look like this:
- **Captions take too long** because text is built title by title instead of generated from speech
- **Reframing breaks pace** because vertical subjects drift and require repeated crop adjustments
- **Style consistency is weak** because reusable social templates are limited
- **Repurposing is clumsy** because one source clip often needs different versions for different channels
- **Review cycles drag** because small edits mean reopening the timeline instead of updating a fast social workflow
That last point matters more than beginners expect. Editing time is not only about cuts. It is about revision speed. If a marketer needs to swap a hook, fix a caption line, or punch in on a speaker for the first three seconds, iMovie starts to feel like a general editor being pushed into a short-form publishing job.
That is usually the point to upgrade.
A purpose-built social tool should handle the repetitive work for you. It should turn one raw video into multiple vertical clips, add captions automatically, keep the subject framed for mobile, and export in formats that match how social teams publish. BlitzReels fits that use case better than iMovie because it is built around speed and engagement, not around adapting a traditional desktop editor to vertical content after the fact.
If you are comparing options, this guide to the [best apps to make Reels](https://www.blitzreels.com/blog/best-apps-to-make-reels) is a useful next read because it compares tools based on turnaround time, formatting, and repeatability.
Some teams also split their workflow by content type. They use one tool for fast social clipping and another to [create AI cinematic videos](https://www.lunabloomai.com/starter-app) when they need branded visuals or campaign assets with a different look.
Use iMovie if you are learning, publishing occasionally, or cutting straightforward clips with minimal text. Upgrade when captions, reframing, and multi-platform output become weekly work. That switch saves hours, and in social video, hours usually matter more than another editing feature.