---
title: "Lighting for Video: A Guide for TikTok & Reels Creators"
canonical: "https://blitzreels.com/blog/lighting-for-video"
---
# Lighting for Video: A Guide for TikTok & Reels Creators
URL: https://blitzreels.com/blog/lighting-for-video
Markdown URL: https://blitzreels.com/blog/lighting-for-video.md
Published: 2026-07-20
Author: BlitzReels
Master lighting for video on a budget. Our guide gives you fast setups, gear tips, and fixes for TikTok, Reels, and Shorts to make your content shine.
Tags: lighting for video, video lighting setup, short form video, tiktok lighting, reels lighting

A short-form creator records a strong take, nails the hook, adds title cards, clips the pauses, and still ends up with a video that looks cheap. The face is too dark, the background is blown out, skin tones look off, and the captions feel harder to read than they should. On TikTok or Reels, that problem shows up before the first idea lands.
That's why lighting for video matters more than most creators think. Good lighting doesn't just make footage prettier. It makes the subject readable, keeps attention on the face, supports cleaner cuts, and helps captions sit naturally on screen instead of fighting a muddy image. In short-form workflows, that's the difference between content that feels polished and content that gets skipped.
## Table of Contents
- [Why Your Great Video Idea Looks Bad on Camera](#why-your-great-video-idea-looks-bad-on-camera)
- [The Unskippable Fundamentals of Video Lighting](#the-unskippable-fundamentals-of-video-lighting)
- [Color temperature decides whether the shot feels coherent](#color-temperature-decides-whether-the-shot-feels-coherent)
- [Exposure starts with enough usable light](#exposure-starts-with-enough-usable-light)
- [Soft light usually wins on short-form platforms](#soft-light-usually-wins-on-short-form-platforms)
- [Four Fast Lighting Setups for Any Budget](#four-fast-lighting-setups-for-any-budget)
- [Window light for creators who want free and flattering](#window-light-for-creators-who-want-free-and-flattering)
- [Single key light for repeatable daily shooting](#single-key-light-for-repeatable-daily-shooting)
- [Three-point lighting for a polished studio look](#three-point-lighting-for-a-polished-studio-look)
- [Ring lights and mobile LEDs for fast content on the move](#ring-lights-and-mobile-leds-for-fast-content-on-the-move)
- [Choosing Your Gear From Budget to Pro](#choosing-your-gear-from-budget-to-pro)
- [What each type of light does well](#what-each-type-of-light-does-well)
- [What to buy first and what to skip](#what-to-buy-first-and-what-to-skip)
- [How to Fix Common Lighting Problems](#how-to-fix-common-lighting-problems)
- [When the face is dark and the background is bright](#when-the-face-is-dark-and-the-background-is-bright)
- [Quick fixes for glare shadows and flicker](#quick-fixes-for-glare-shadows-and-flicker)
- [Light Your Video Edit Your Content and Post Faster](#light-your-video-edit-your-content-and-post-faster)
## Why Your Great Video Idea Looks Bad on Camera
A founder films a useful answer to a common customer question. The script is tight. The clip is under the ideal **15 to 30 seconds** for short-form engagement, and the strongest value should land in the middle after a quick opening hook, as noted in [this short video workflow guide](https://www.finchley.co.uk/finchley-learning/short-video-hacks-simplify-videography-editing-for-tiktok-and-instagram-reels). But the final result still looks flat and forgettable.
The usual reason isn't the phone, the mic, or the editing app. It's lighting. Poor lighting makes skin look gray, eyes lose definition, and the whole frame reads as amateur before the audience even decides whether the idea is worth hearing. In short-form video, where viewers judge in seconds, that visual first impression shapes whether the hook gets a chance.
A second problem shows up after recording. Weak lighting limits what editors can rescue. Cropping for vertical framing, clipping dead space, adding title cards, and resizing for TikTok, Reels, Shorts, or LinkedIn all work better when the original face shot is clear. A dim image falls apart faster once it's reframed and compressed for mobile feeds.
> Good short-form lighting doesn't need a studio. It needs control.
That's why creators who want reliable performance focus on simple, repeatable setups. A window in the right spot. One soft LED panel. A clean angle that puts the face first. The fastest path to better results usually isn't more gear. It's getting a few fundamentals right, then repeating them every time. For creators tightening up the full workflow, these [quick pro techniques for polished short-form videos](https://www.blitzreels.com/blog/10-quick-pro-techniques-for-polished-short-form-videos) pair well with the lighting fixes below.
## The Unskippable Fundamentals of Video Lighting
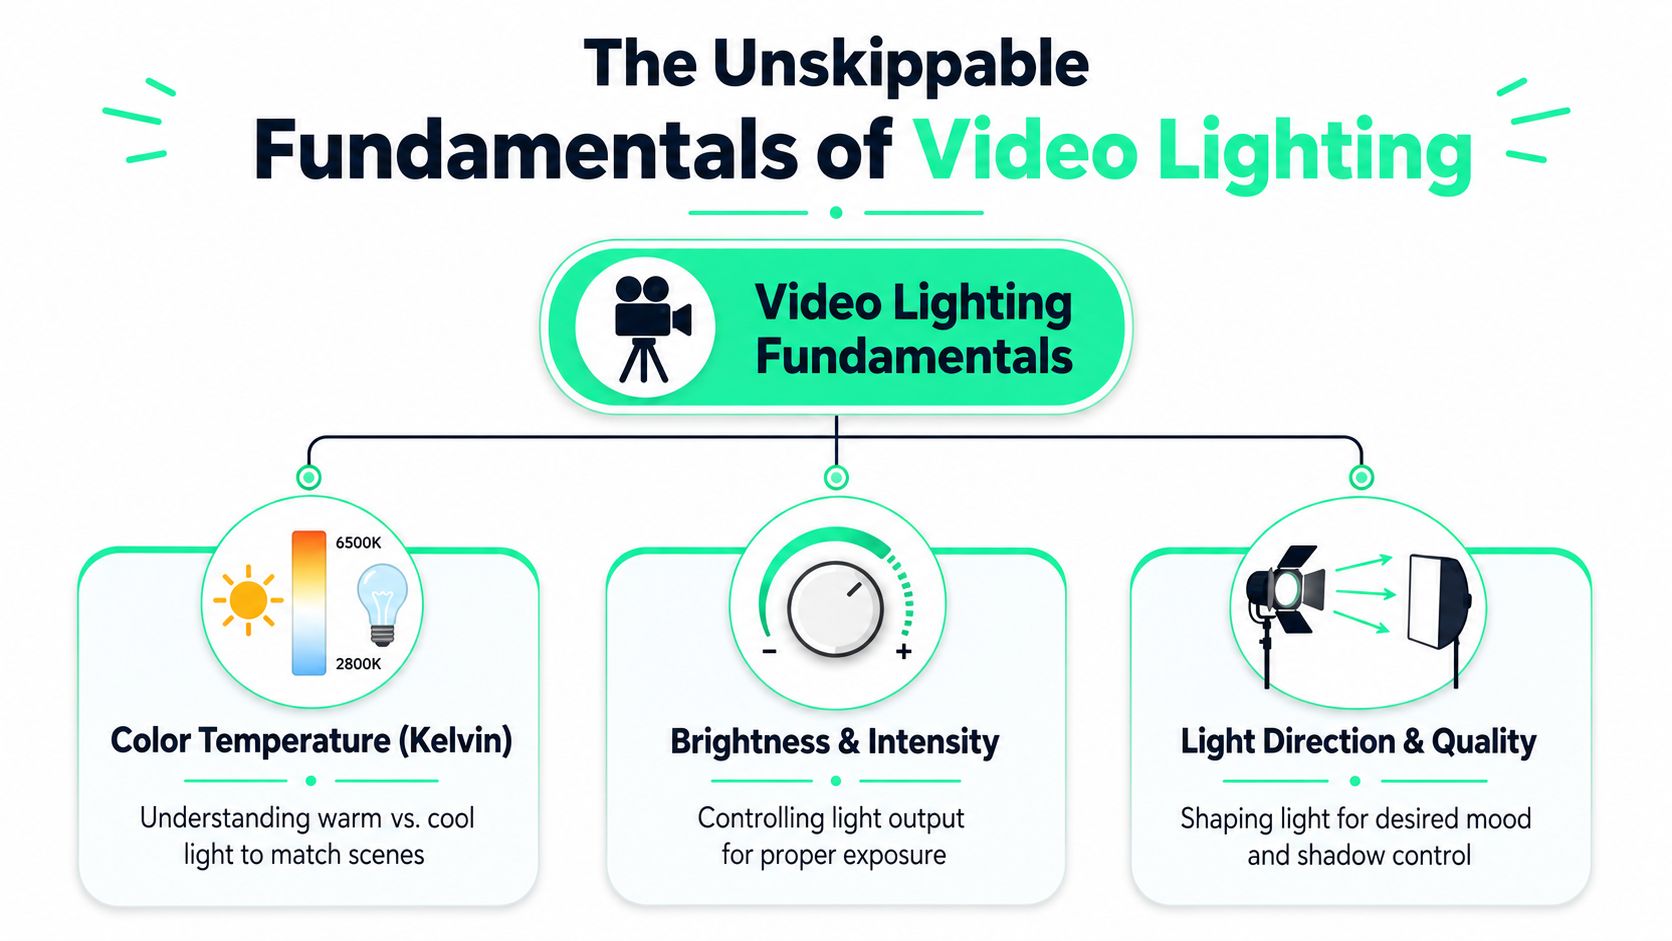
A strong hook dies fast when the viewer has to work to read your face. On TikTok and Reels, lighting controls that first second. It also affects how cleanly AI caption tools like BlitzReels separate your subject from the background, which changes how readable those captions feel once they land on a small screen.
### Color temperature decides whether the shot feels coherent
Color temperature is the first thing I fix because mixed light makes footage look cheap, even with a good camera. If daylight hits one side of the face and a warm household bulb hits the other, skin turns patchy and the frame starts fighting itself.
For short-form video, consistency beats complexity. Pick one dominant light color and build around it. Daylight-balanced light tends to look clean for educational clips, product demos, and talking-head content because it keeps skin, clothes, and backgrounds predictable during editing. That also gives caption overlays a more stable base, especially when white or high-contrast text needs to stay legible over cheeks, jawlines, or bright walls.
A basic grasp of [color grading for short-form video](https://www.blitzreels.com/glossary/color-grading) helps here. Better lighting reduces how much fixing the edit needs later.
A broader [audio visual lighting guide](https://londonaudiovisualhire.co.uk/audio-visual-lighting/) is useful here because it treats lighting as part of the full image, including screen readability and presentation quality.
### Exposure starts with enough usable light
Creators lose time trying to rescue dark footage with ISO, filters, or auto settings. The camera can only do so much. If the face starts underexposed, the image usually turns noisy, soft, or muddy after platform compression.
The practical fix is simple. Increase the amount of usable light on the subject before touching fancy settings. In real shoots, that usually means moving closer to a window, bringing the key light nearer, or raising output while keeping the light soft.
Three quick checks catch most exposure problems:
- **If the face looks grainy**, add more light to the subject first.
- **If skin loses detail in bright spots**, lower the intensity or move the light farther back.
- **If AI-generated captions blend into the image**, create more contrast between the subject and the background so text has cleaner visual separation.
That last point gets missed a lot. Caption tools can generate the words, but lighting determines whether those words sit clearly in frame or fight with a busy, low-contrast image.
### Soft light usually wins on short-form platforms
Soft light flatters fast. It smooths skin, keeps shadows controlled, and holds attention on the speaker instead of on harsh contrast across the nose or under the eyes.
That matters on mobile feeds where viewers scroll quickly and screens are small. Hard light can look dramatic, but it also exaggerates texture, creates sharp shadow lines, and makes jump cuts feel harsher. Soft light gives talking-head videos, tutorials, and founder clips a cleaner look that reads as more trustworthy and easier to watch.
> **Practical rule:** If the shadow grabs attention before the line delivery does, soften the source or change its angle.
Diffused LEDs, softboxes, bounced light, and indirect window light all solve this well. They make faces easier to read, help auto-captions sit more cleanly over the image, and reduce the amount of correction needed before posting.
## Four Fast Lighting Setups for Any Budget
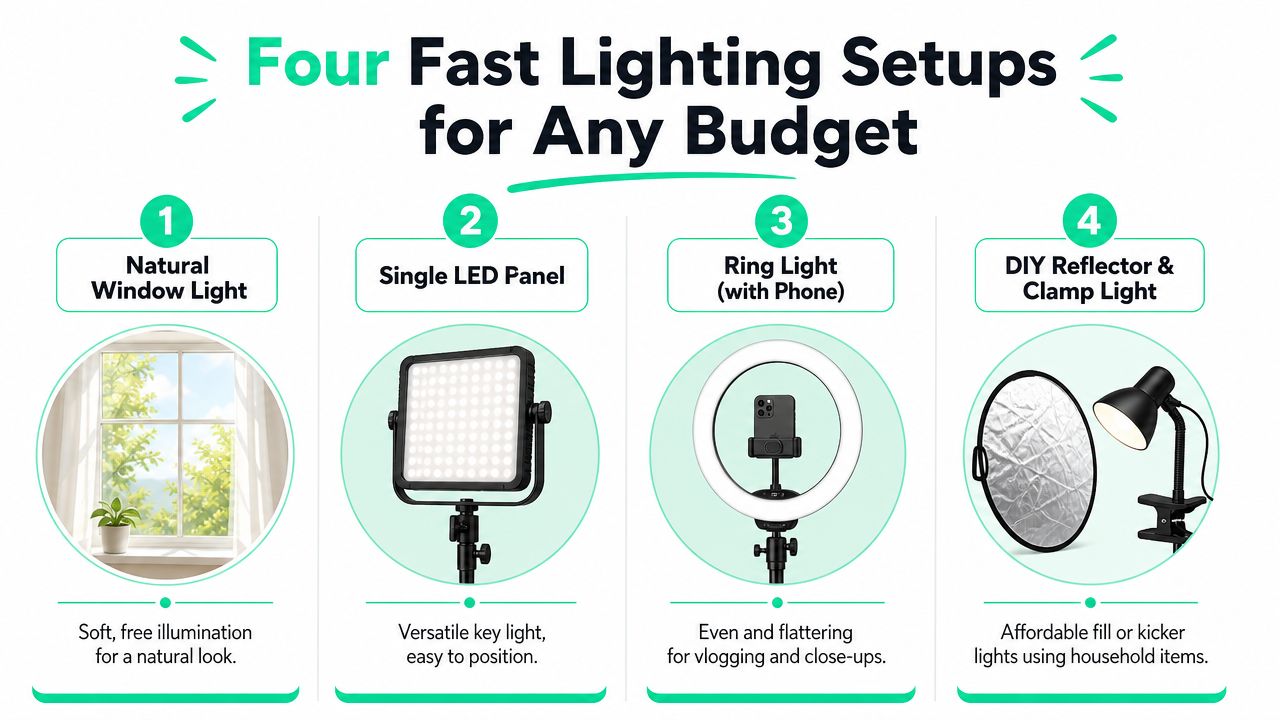
Short-form creators don't need one perfect setup. They need four dependable ones that cover most recording situations. A home office, a desk setup, a coffee shop corner, and a quick phone shoot all call for different compromises.
A visual overview helps before the details.
### Window light for creators who want free and flattering
The fastest no-budget setup is side-on natural light from a window. For short-form video, positioning the subject beside a window creates consistent, flattering illumination and avoids the harsh look of overhead room lights, as explained in this [guide to short-form video for Instagram and TikTok](https://csjmarketing.co.uk/guide-to-short-form-video-instagram-tiktok/).
This works especially well for creators filming explainers, reaction clips, and founder updates at home. The face gets shape without looking dramatic, and the light feels clean on mobile screens.
Use this setup like this:
- **Stand beside the window:** Keep the window to one side of the face, not directly behind.
- **Turn off overhead lights:** Mixed room light adds ugly color casts.
- **Face slightly toward the brighter side:** That keeps the eyes alive without flattening the whole face.
### Single key light for repeatable daily shooting
One soft LED panel is the workhorse setup for creators who post often. It's fast to place, easy to repeat, and stable in rooms where daylight changes. The biggest win is consistency. A creator can film multiple clips, batch title-card intros, and record alternate hooks without the image shifting every half hour.
A few placement choices make the difference between clean and awkward:
| Setup choice | What works | What usually fails |
|---|---|---|
| Light position | Slightly off to one side and above eye line | Straight from below, which creates an unsettling look |
| Distance | Far enough back for smooth falloff | Too close, which overexposes skin |
| Background | A little separation from the wall | Standing right against the wall |
A quick demo can help creators picture how fast this can be in practice.
For creators editing vertical clips daily, a dedicated [vertical video editor](https://www.blitzreels.com/blog/vertical-video-editor) matters after capture, but the lighting still does the heavy lifting at the source.
### Three-point lighting for a polished studio look
Three-point lighting is still the cleanest repeatable setup for creators who want a more produced look. In a standard setup, the **key light goes at a 45° angle and above eye level**, while the **fill light sits on the opposite side at 30 to 60 percent of the key light's intensity**, creating balance without harsh shadows, according to this [three-point lighting demonstration](https://www.youtube.com/watch?v=Ryu8s73dWQY).
That sounds formal, but it's simple in practice:
1. Place the **key light** first. This is the main source.
2. Add the **fill** only until the shadow side looks controlled, not flat.
3. Put a **backlight** behind the subject for separation from the background.
> Raise the key light if glasses catch glare. Lowering it usually makes the reflection worse and the face less trustworthy on camera.
This setup suits product demos, polished brand explainers, interview-style clips, and any content that will be clipped into multiple platform versions later.
### Ring lights and mobile LEDs for fast content on the move
Ring lights still make sense for selfie-style videos, beauty content, and direct-to-camera scripts recorded on a phone. They're fast, compact, and forgiving when a creator needs even frontal light. The trade-off is that they can flatten the face and make the image look generic if used for every type of content.
Small mobile LEDs are more flexible. They can act as a key, a side light, or a background accent. They're useful for creators filming in shared offices, retail spaces, or temporary locations where a full setup isn't possible.
The best use cases look like this:
- **Ring light:** Close-up speaking clips, face-forward tutorials, and quick social updates.
- **Small LED panel:** Product shots, desk videos, and creator setups that need more shape.
- **Phone plus reflector hack:** A simple way to fill shadows when traveling light.
## Choosing Your Gear From Budget to Pro
Buying lights too early often wastes money. The smarter move is matching gear to the kind of content being recorded most often. A creator posting daily talking-head clips needs something different from a team filming interviews, product shots, and repurposed webinar segments.
### What each type of light does well
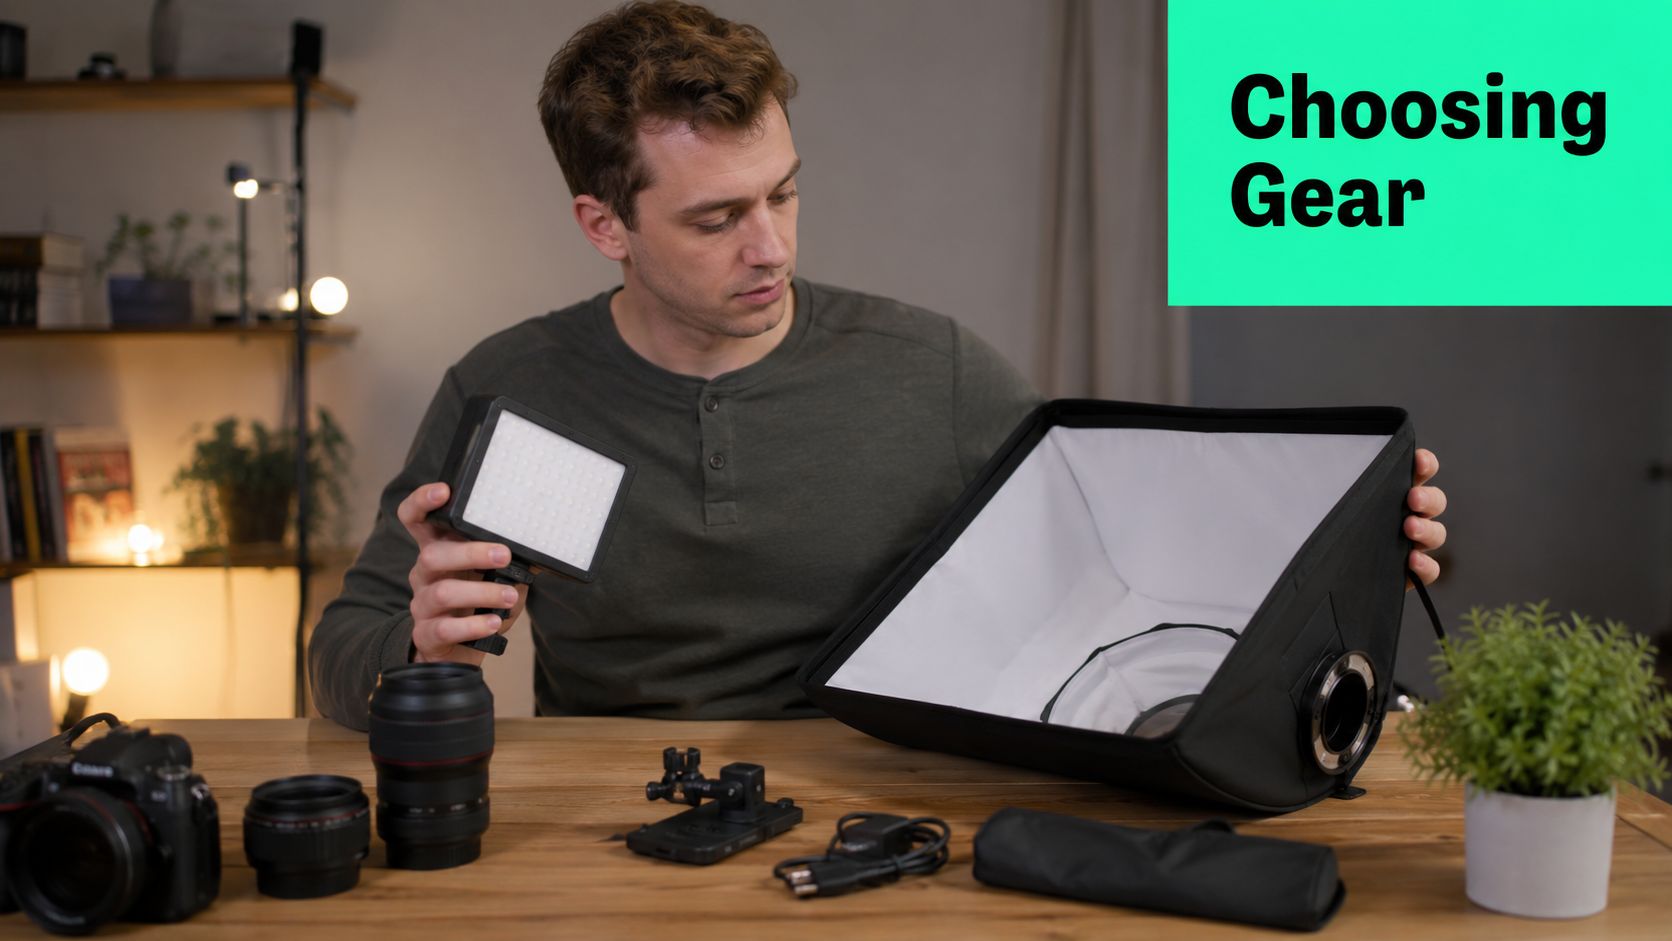
**Ring lights** are simple. They create even frontal light and work well for beginner creators who film close to the camera. Their weakness is depth. Everything can look a bit too even, which isn't ideal for more premium brand content.
**LED panel lights** are the most versatile option for short-form work. They can serve as a key light, background light, or travel-friendly main source. With a diffuser, they become much more flattering. Without one, they can get harsh fast.
**Softboxes** take up more room, but they usually produce the most professional-looking result for face-to-camera video. According to this [gear-focused videography lighting guide](https://gvmled.com/complete-videography-lighting-guide-setup-pro-techniques-2026/), using soft light sources like a softbox or diffuser improves commercial appeal, while un-diffused hard light creates harsh shadows that often need extra cleanup later.
> Cheap light isn't always bad. Cheap hard light is usually the problem.
### What to buy first and what to skip
The best starter purchase for most creators is one controllable soft source. That could be a diffused LED panel or a compact softbox. One good light used well beats a pile of mismatched lights that create tint problems and awkward shadows.
A useful buying order looks like this:
- **Start with one main light:** Prioritize control and softness over accessories.
- **Add a stand you trust:** A shaky stand slows every shoot down.
- **Upgrade with diffusion before extra bulbs:** Better light quality matters more than extra clutter.
- **Skip hardware-store clamp lights as a main key:** They can work for background accents, but they usually look rough on faces.
Creators comparing editing apps after capture will find plenty of overlap in feature lists, but gear decisions should still be based on footage style first. This roundup of [apps to make Reels](https://www.blitzreels.com/blog/best-apps-to-make-reels) is useful once the recording side is under control.
## How to Fix Common Lighting Problems
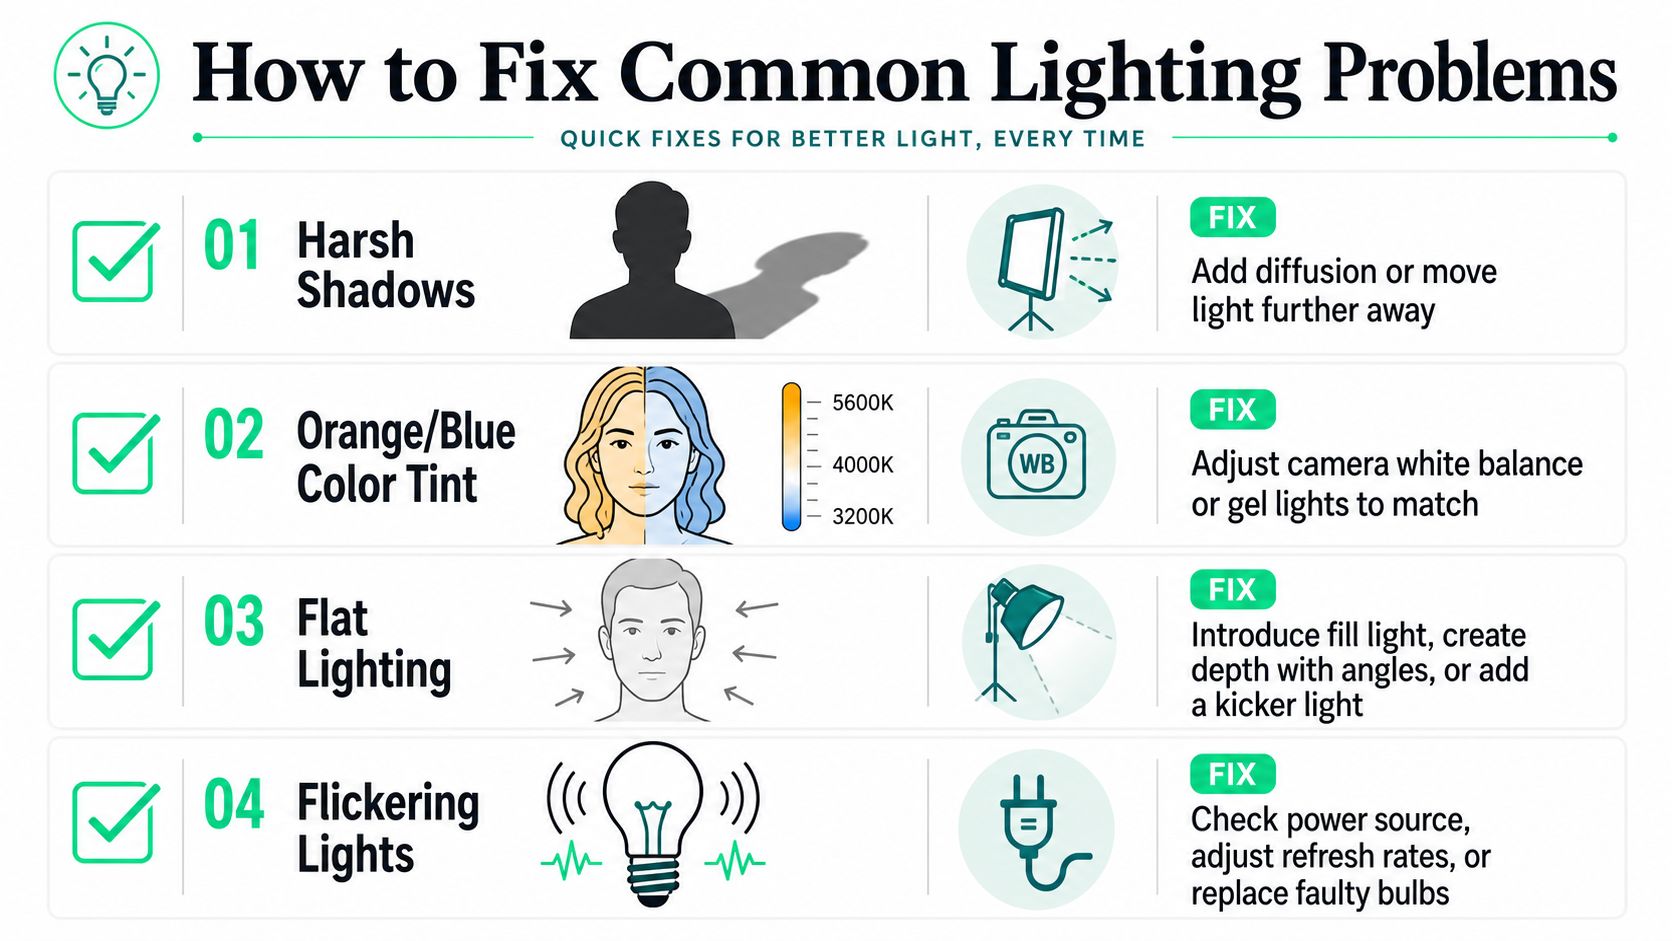
Most lighting problems aren't gear failures. They're placement problems. A creator can own a solid light and still get dull footage if the angle, height, or room setup is wrong.
### When the face is dark and the background is bright
This is the most common failure in creator videos. A bright window or lamp behind the subject tricks the camera into exposing for the background. The face drops into shadow and the clip looks unusable.
The fix is direct and reliable. A camera often locks onto the brightest area in frame, so the solution is to make the face the priority by pointing the primary light source at it, as described in the earlier gear section's source. In practical terms, that means moving the main light forward, turning away from strong backlight, or changing position so the subject becomes the brightest part of the image.
Use this fast checklist:
- **Face the main light toward the subject:** Don't let a window behind the chair dominate exposure.
- **Reduce background brightness:** Close blinds or change angle.
- **Test record before the full take:** Phones and webcams often react differently than expected.
### Quick fixes for glare shadows and flicker
Glasses glare usually comes from a light that's aimed straight into the lenses. Raising the light angle solves it more often than moving the subject. That small height change redirects reflections away from the camera while keeping the face lit.
Harsh shadows usually mean the light is too small, too hard, or too close. Adding diffusion helps. Moving the source farther away can help too, because the transition between light and shadow becomes less abrupt.
Flicker is a different issue. The lighting reference cited earlier notes that avoiding flicker at **100 to 120 Hz** matters for recorded video because exposure artifacts can appear under some fluorescent sources. If a room light flickers, the fastest solution is usually replacing that source or using a different controlled light entirely.
> If a creator has to choose between a fancy background and a clear face, the face wins every time.
For mobile-first workflows, this matters before editing starts. A cleanly lit shot makes reframing, resizing, and quick phone edits much easier. Creators working from a phone can pair these lighting fixes with a practical guide on [how to edit videos on iPhone](https://www.blitzreels.com/blog/how-to-edit-videos-on-iphone).
## Light Your Video Edit Your Content and Post Faster
Good lighting speeds up the whole short-form workflow. Clear light gives you cleaner footage, stronger eye contact, and fewer editing problems to fix later. On TikTok and Reels, that usually shows up as better watch time in the first few seconds because the subject reads fast on a small screen.
It also gives AI tools better material to work with. Even face lighting helps reframing stay locked on the speaker instead of drifting. Clean contrast around the face gives caption tools a more stable background, so AI-generated text is easier to place and easier to read. If you use auto-captions in a fast-cut edit, that difference is not cosmetic. It affects whether viewers can follow the point before they scroll.
Captions carry a lot of the load in silent viewing, and lighting plays into that more than creators expect. A muddy image, bright window blowout, or patchy skin tones can fight with on-screen text, especially in vertical formats where captions sit close to the face. Clean lighting gives tools like BlitzReels a better canvas for on-beat captions, cleaner crops, and faster edits that do not need constant manual correction.
Once your lighting is locked in, the next bottleneck is the edit itself. Creators who want to sharpen the full package can also tighten the soundtrack side with this guide on [How to make AI music for TikTok](https://vocuno.com/use-case/ai-music-for-tiktok).
Strong lighting makes every short easier to watch and easier to process. [BlitzReels](https://blitzreels.com) takes clean footage and turns it into clipped, captioned, resized videos for TikTok, Instagram Reels, YouTube Shorts, LinkedIn, and more, with hooks, reframing, templates, and exports built for a fast short-form workflow.